Set up a FRITZ!Box (FRITZ!OS 7.10 or later) as a device for the Cloud PBX
Manufacturer: AVM
Model: FRITZ!Box
Models: 7690, 7590 AX, 7590, 7560, 7530, 7490, 7460, 7430
Firmware: FRITZ!OS 7.10 (last tested with FRITZ!OS 8)
Manufacturer's website: avm.de
Notes
Limitations of the FRITZ!Box for Business Customers
Please always register IP phones directly with our Cloud PBX instead of the FRITZ!Box, as an IP phone connected to the FRITZ!Box already occupies two channels for a single call. However, depending on the model, a FRITZ!Box can establish a maximum of 5 to 8 SIP channels simultaneously.
Using the FRITZ!Box in combination with the Cloud PBX only makes sense if you want to integrate DECT phones (up to six phones and three to five calls simultaneously), ISDN phones (up to two calls simultaneously), or analog phones (one call per phone, up to two phones).
For larger companies, we recommend using the Cloud PBX with certified IP phones.
Further Information
Please also refer to our general information on the phone number format for incoming calls.
Instructions
1. Open the FRITZ!Box user interface
Open the FRITZ!Box user interface in your browser by entering "fritz.box" in the address bar. If you encounter any problems, here are some tips for logging in to a FRITZ!Box.
Log in using your FRITZ!Box password. You are now on the user interface.
2. Launch the Phone Number Assistant
Please click on "Telephony" in the menu bar on the left. A submenu will open. Please click on "My Phone Number" there.
Then click on the blue “New Phone Numbers” button on the right-hand side.
3. Enter your login credentials
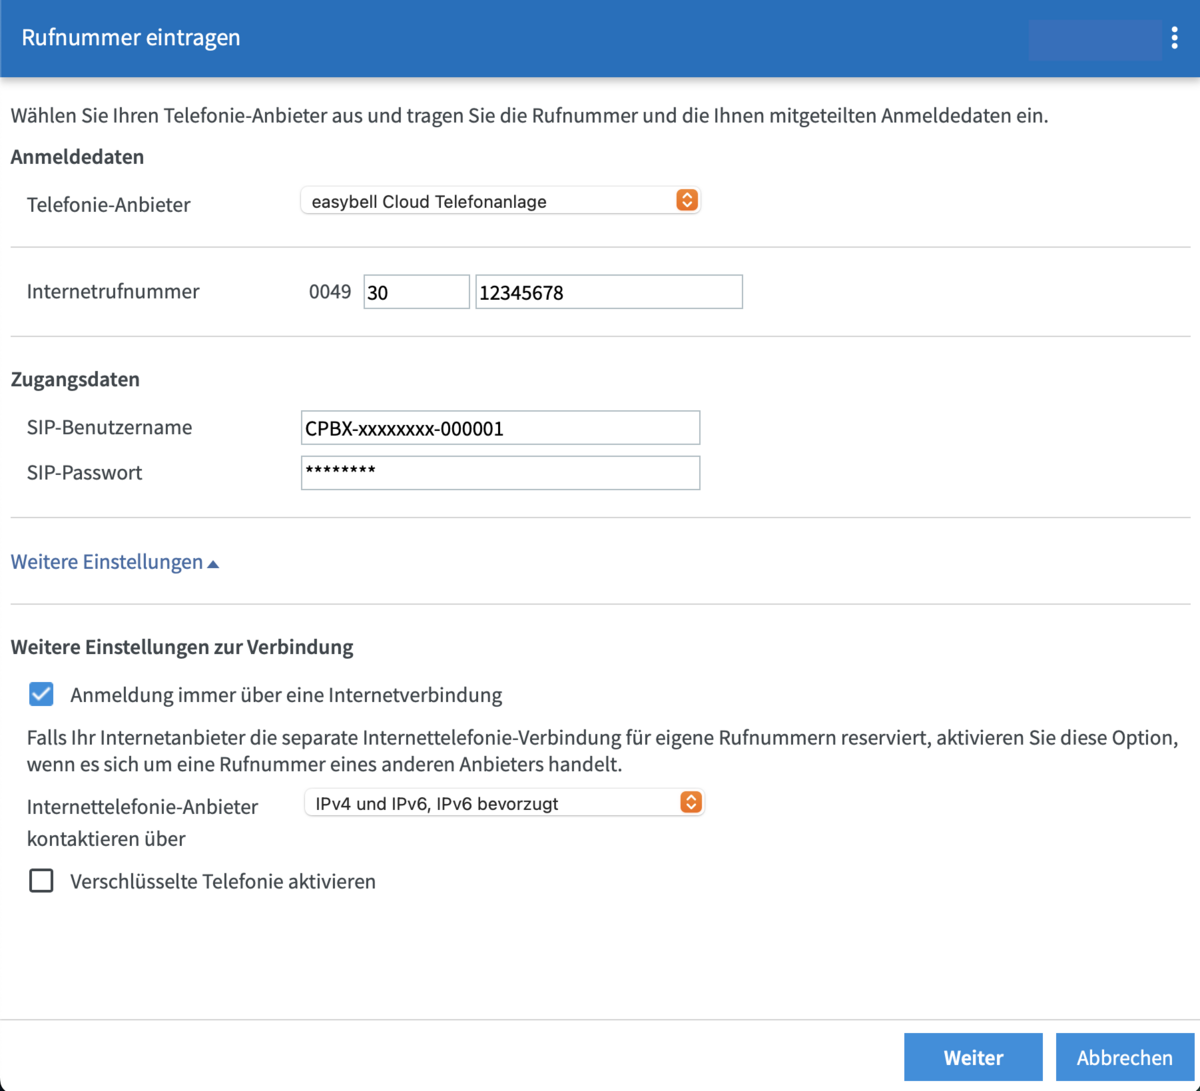
Please provide the following information:
Telephony provider: easybell Cloud PBX
Internet phone number: The phone number used for the desired device in international format (country code (already specified) + area code without zero + phone number)
SIP username and SIP password: You can find these in your Cloud PBX under the settings for the respective device. For more detailed instructions, please read our article “How do I find my SIP login credentials?”.
You generally do not need to concern yourself with the advanced settings.
Always log in via an Internet connection: enabled (visible only in advanced view)
Contact Internet telephony provider via: IPv4 and IPv6, IPv6 preferred (You will only see this menu item if your Internet connection supports IPv6.)
Encrypt telephony: Enable this if you want to encrypt the connection between the Cloud PBX and your FRITZ!Box; please check the box
Click "Next".
4. Complete the setup
On the next page, you can review your settings; click "Next" again.
If you have entered everything correctly and your box is connected to the internet, you should now be able to make calls. If this is the first number you have set up, all future calls will be made using this number.
Please remember to configure your phones according to your preferences under the menu item “Telephony” → “Telephony Devices.”
If you want to transfer calls: Disable external hold
With the FRITZ!Box set to its factory settings, call transfer between connected phones is not possible. To change this, you must first disable the "External Hold" option. To do this, please enter the following key code on a phone connected to the FRITZ!Box:
Disable External Hold: #9608
If you want to reactivate the feature later, enter #9609.
Ensuring reachability of emergency numbers
In Germany, almost all telephone connections are IP-based nowadays. Conventional fixed network telephony is therefore deactivated by default in the FRITZ!Box. To ensure the reachability of emergency numbers, we recommend checking this setting:
On the FRITZ!Box interface, go to "Telephony" → "Own numbers" → "Connection settings". The "Fixed network active" option must be deactivated.