Configure Zoiper (desktop version) for phone numbers and Cloud PBX
Version: 5
Operating systems: Windows, Mac OSX and Linux
Website of the manufacturer: www.zoiper.com
Setup
1. Install program
You can download the Zoiper softphone client from the manufacturer's website and then install it on your PC or Mac.
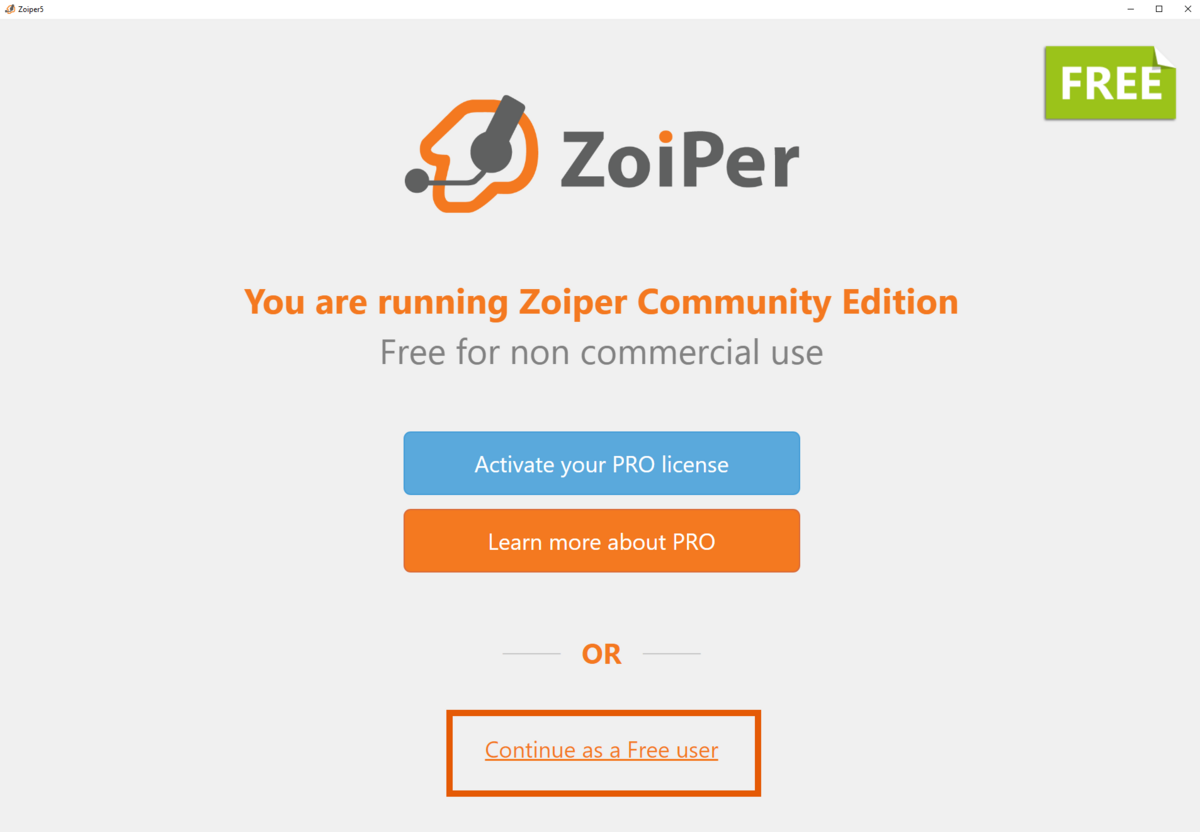
In the start window, please click on "Contiune as a Free User" to use the free version.
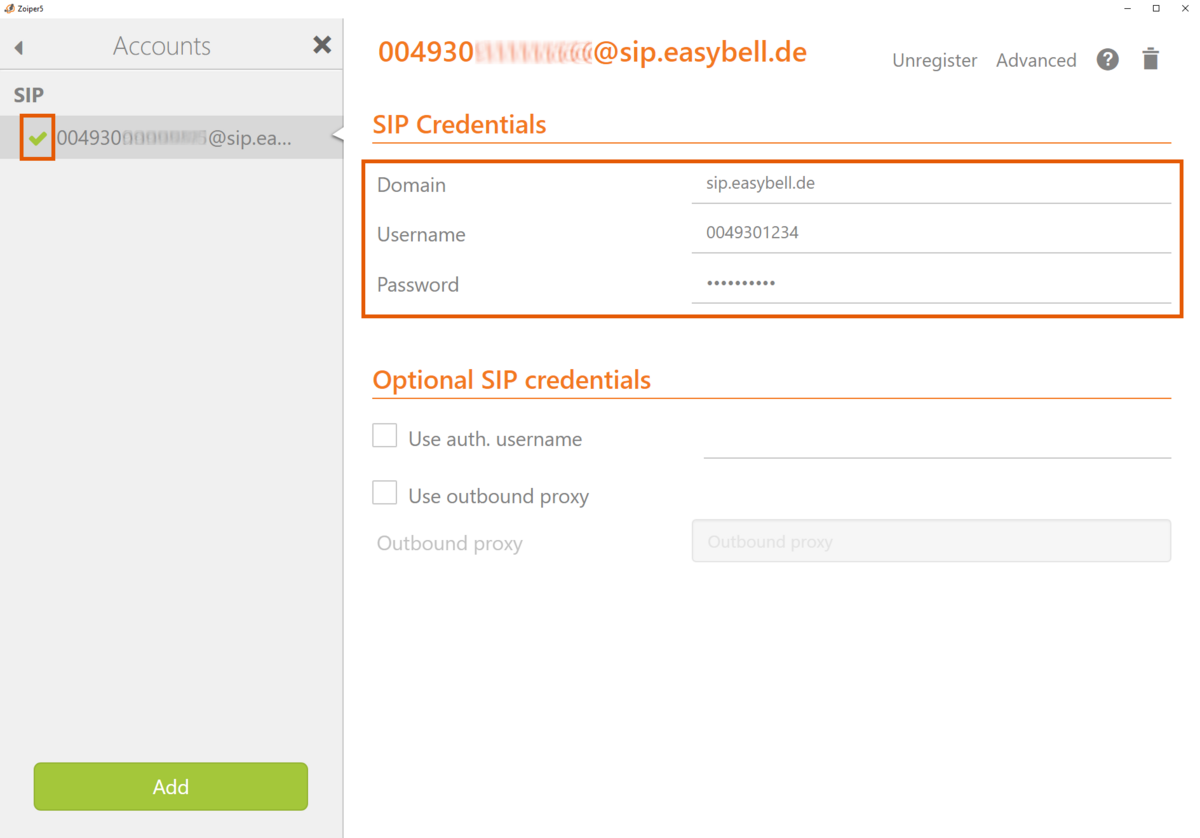
2. Enter SIP access data
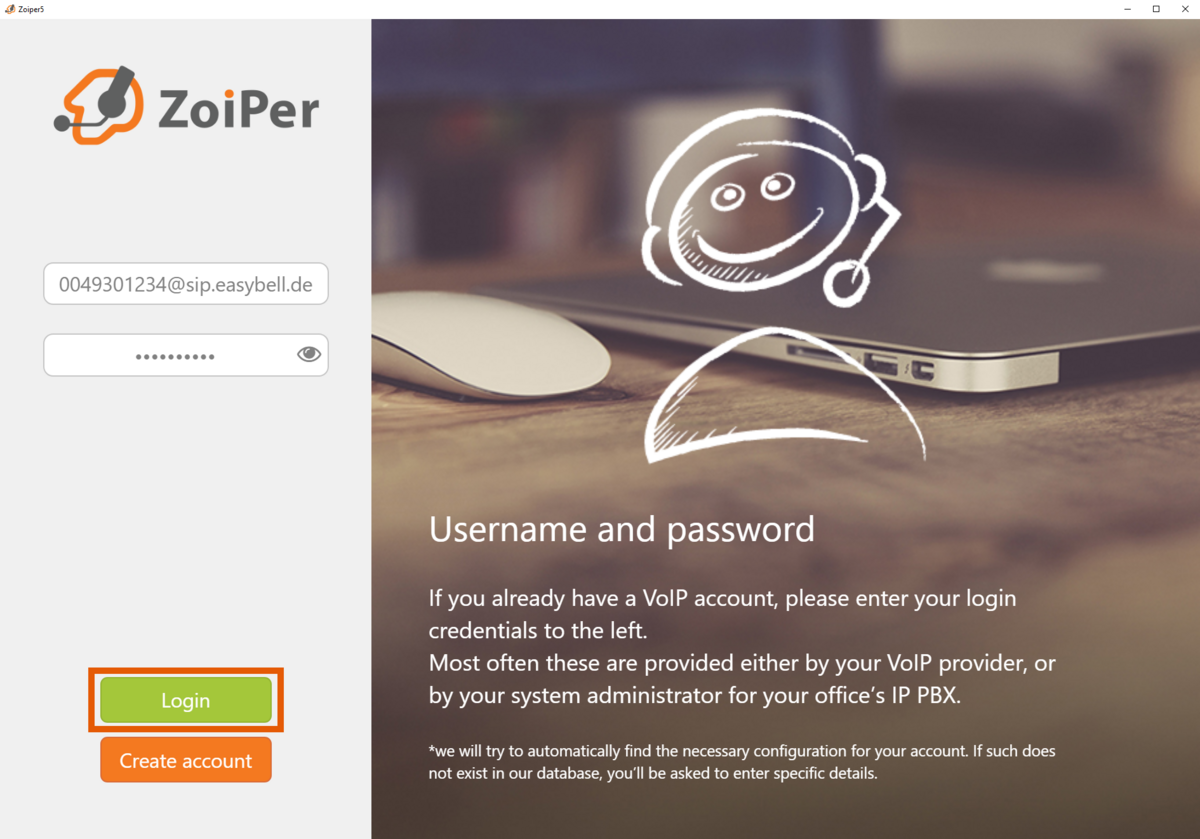
Please enter your username and password in the following window.
a. For a phone number:
Username: SIP user name from the Easybell customer portal with the extension "@sip.easybell.de", here as an example "0049301234@sip.easybell.de"
Password: SIP authentication from the customer portal
b. For the cloud telephone system:
Username: SIP user name from the Easybell customer portal with the extension "@pbx.easybell.de", here as an example "CPBX-12a34b56-000001@pbx.easybell.de"
Password: SIP authentication from the easybell customer portal
Confirm by clicking on "Login".
Where can I find my SIP login details?
The SIP access data differs depending on the product. If you have difficulties finding the data, read "Where can I find my SIP access data?".
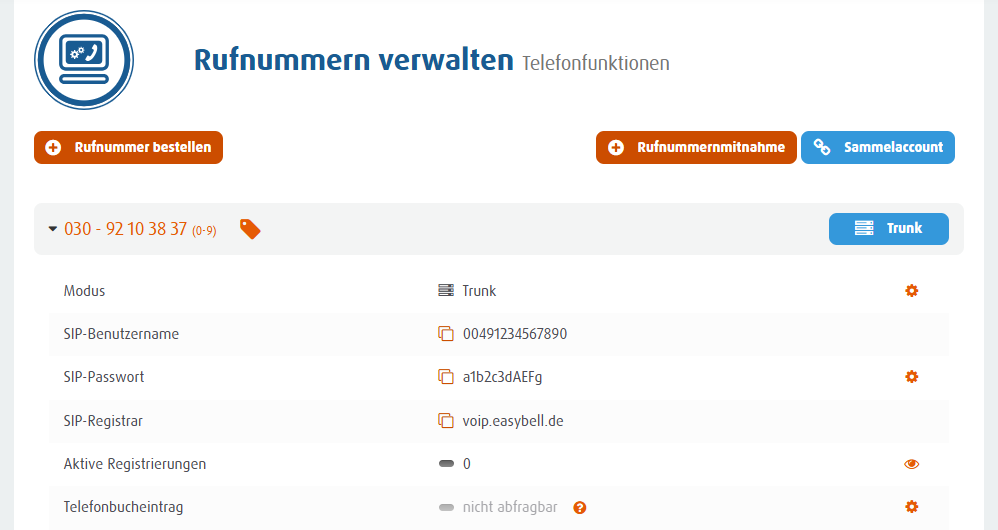
Phone numbers (blocks)
SIP access data: In the customer portal under "Manage phone numbers" in the detailed view of the respective phone numbers.
Registrar: voip.easybell.de
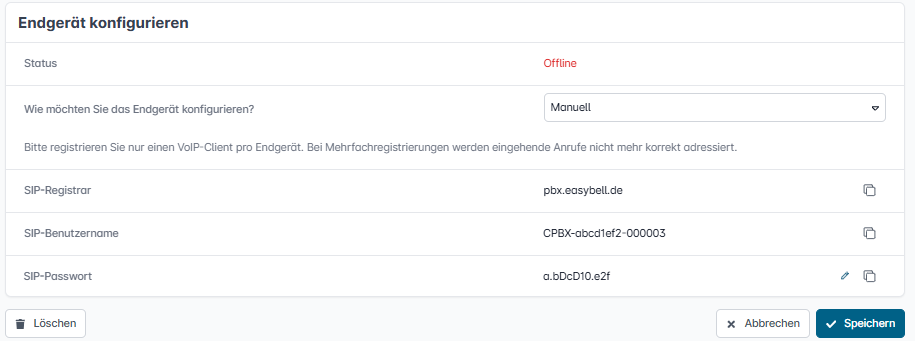
Cloud PBX
SIP access data: In the Cloud PBX in the settings of the respective device under "Configure device".
Registrar: pbx.easybell.de
3. Register registrar
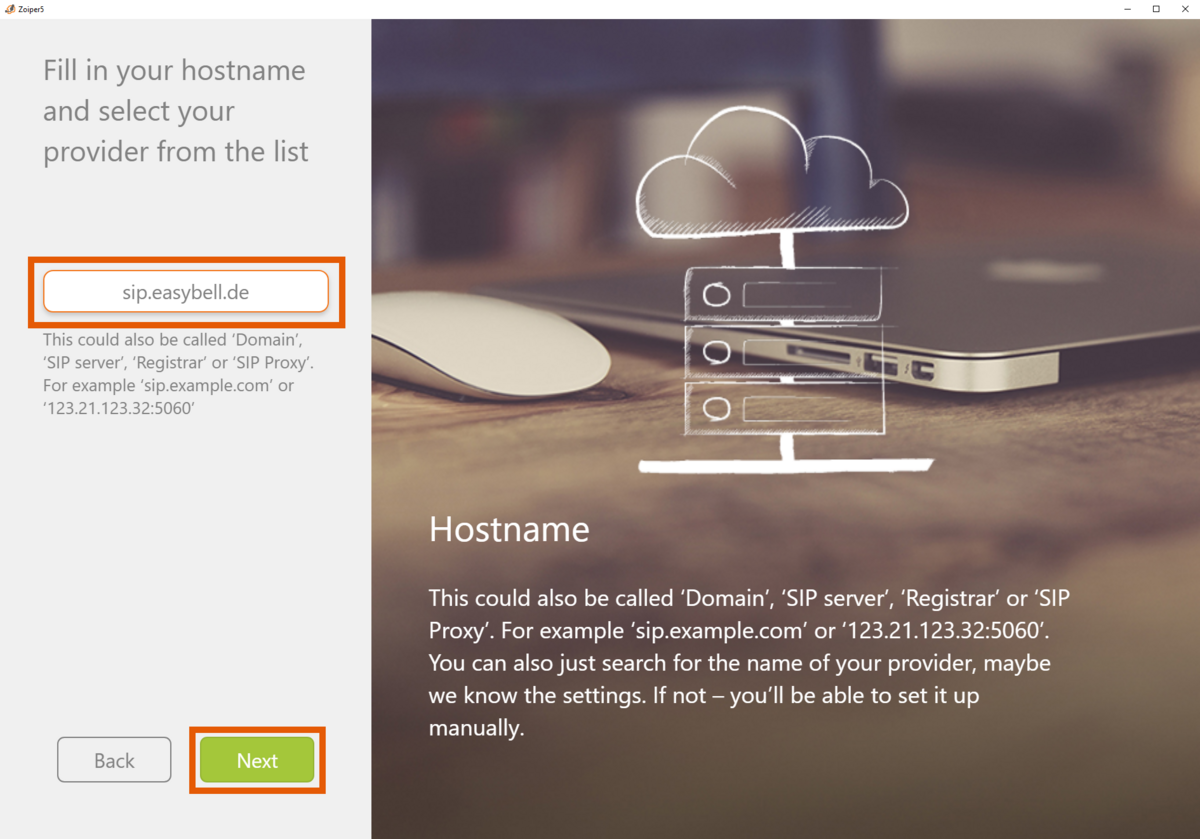
Please enter the host name or SIP registrar in the corresponding field.
a. For a phone number:
"voip.easybell.de"
b. For the cloud telephone system:
"pbx.easybell.de"
Continue by clicking on "Next".
The "Authentication and Outbound proxy" entry is not mandatory, so you can go to the next step by clicking "Skip".
You can set this up later at any time under Settings → Accounts.

4. Test connection
This is followed by a test of the data transport. After the SIP TCP test is displayed as successful with "Found" highlighted in green, please click on "Next" to continue.
In the settings under "Settings" → "Account", the green tick now also indicates that your softphone has been successfully registered.
5. Set codecs
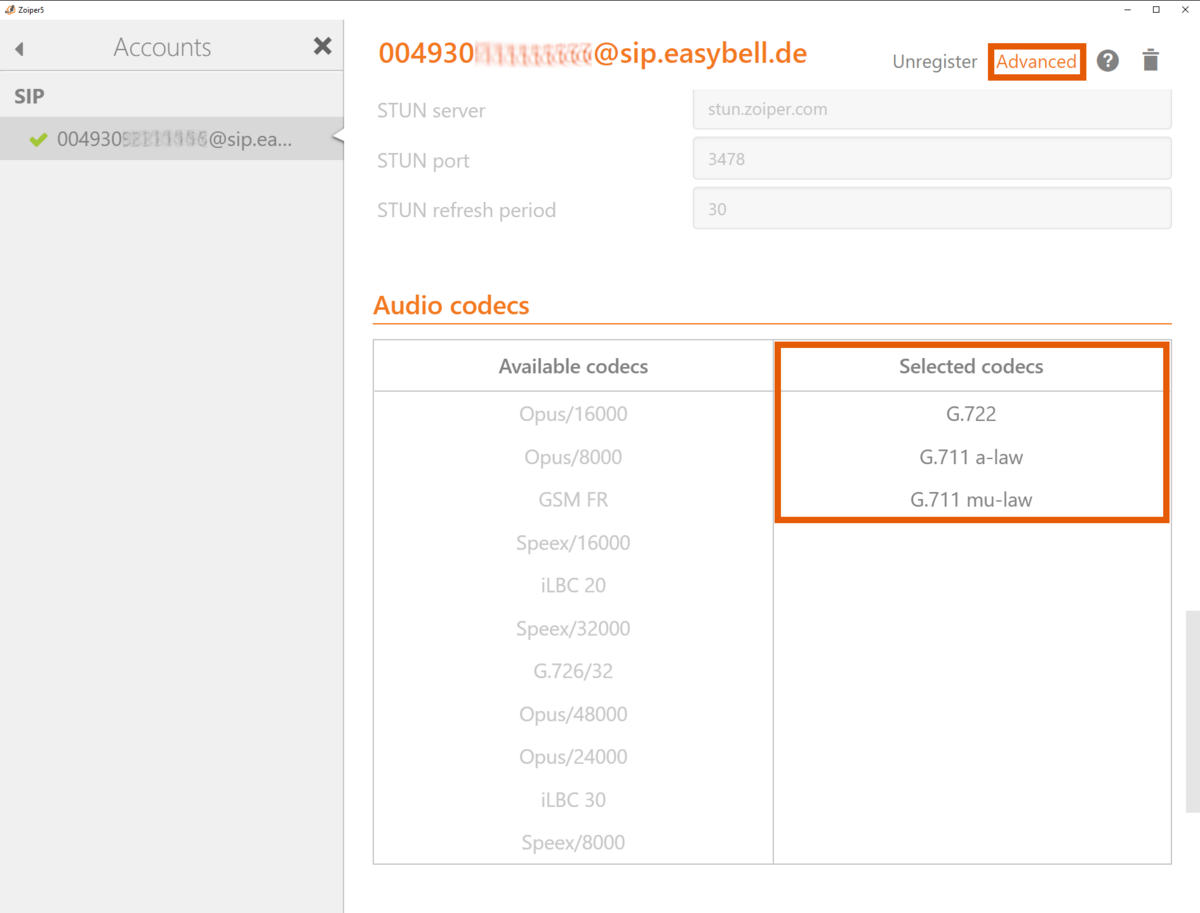
In the "Advanced" area, you can select the supported audio codecs by drag-and-drop:
- G.722
- G.711 a-law
- G.711 mu-law.
By clicking on the X symbol, you can leave the "Settings" area and return to the phone interface.
Making calls with Zoiper
Click on the keypad symbol to display the keypad so that you can enter a phone number and press "Dial" to establish the connection.