OpenVox UC Series IPPBX Version 2.4.2
Manufacturer: OpenVox
Name: UC300/500
Firmware: Version 2.4.2
Website:https://www.openvox.cn/
These instructions should help you to set up the OpenVox UC Series IPPBX with the SIP trunk from easybell without any problems.
Please also note our general information on the number format for incoming calls.
Note: We currently have no information from the manufacturer as to which SIP header is used for number transmission with CLIP no screening. The corresponding SIP header must be specified in the phone number display settings in the easybell customer portal. If necessary, please contact your PBX manufacturer or installation partner.
Hinweis: Aktuell liegen uns keine Informationen des Herstellers dazu vor, über welche SIP-Header die Rufnummernübertragung bei CLIP no screening erfolgt. Der entsprechende SIP-Header ist in den Einstellungen zur Rufnummernanzeige im easybell Kundenportal anzugeben. Kontaktieren Sie hierzu ggf. Ihren TK-Anlagenhersteller oder Installationspartner.
1. Add SIP trunk
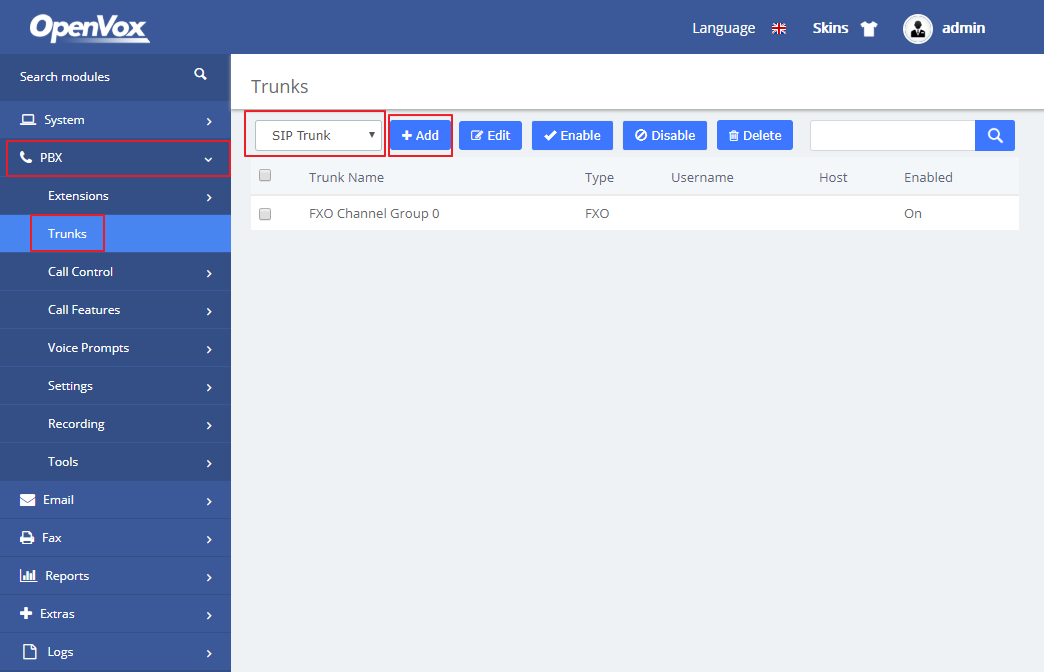
Select "PBX" in the left menu bar and then "Trunks".
Click on "Add" to create a new SIP trunk.
2. Set up SIP trunk
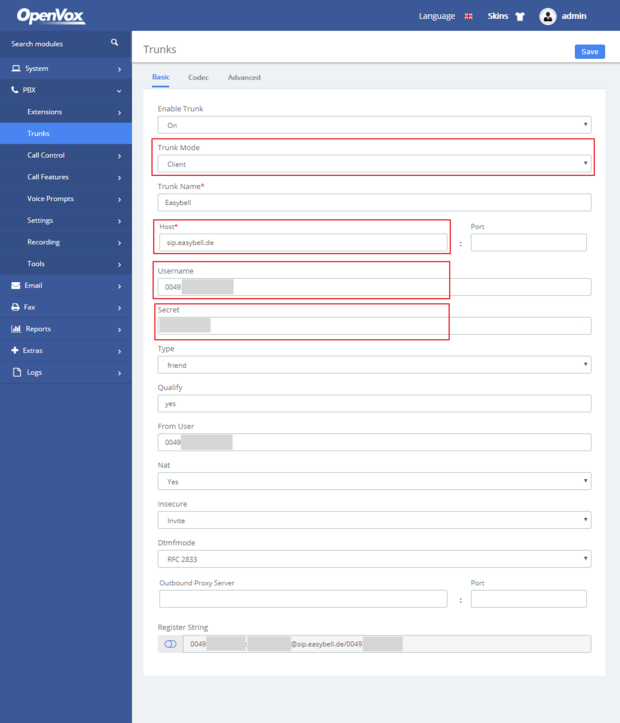
Set up the following parameters:
Trunk Mode: Client
Trunk Name*: Select a name, but please note that it should be different from all other trunk names.
Host*: sip.easybell.de (SIP registrar, assigned by easybell)
Username: SIP username, assigned by easybell
Secret: SIP password, assigned by easybell
The register string is generated automatically. Other parameters are set by default.
Wo finde ich meine SIP-Zugangsdaten?
3. Create extensions
10 SIP extensions are preconfigured in the UC IPPBX. However, you can also add more or edit extensions.
To do this, click on PBX → Extension → Extensions.
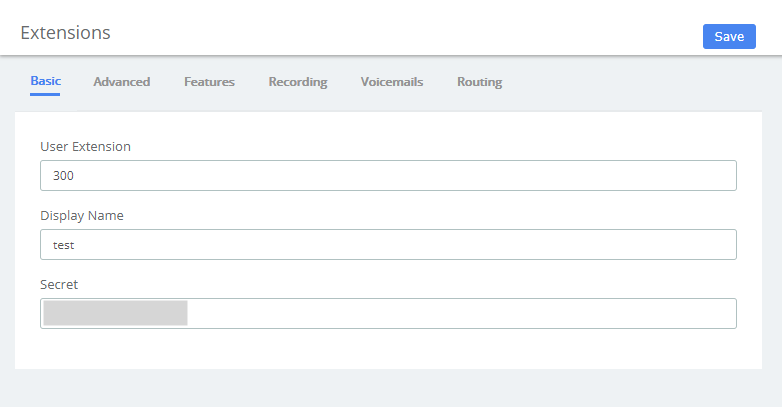
Now select a SIP extension and click on Add to create a new extension. Here you can now set up the number, name and password as well as adjust the answering machine settings and other settings.
The parameters to be entered are as follows:
User extension: The extension number to be dialed to reach this user.
Display name: The name of the CallerID to display the user's name for outgoing calls.
Other advanced settings are also made at your own discretion. The default parameters are already correct.
4. Set up inbound routing
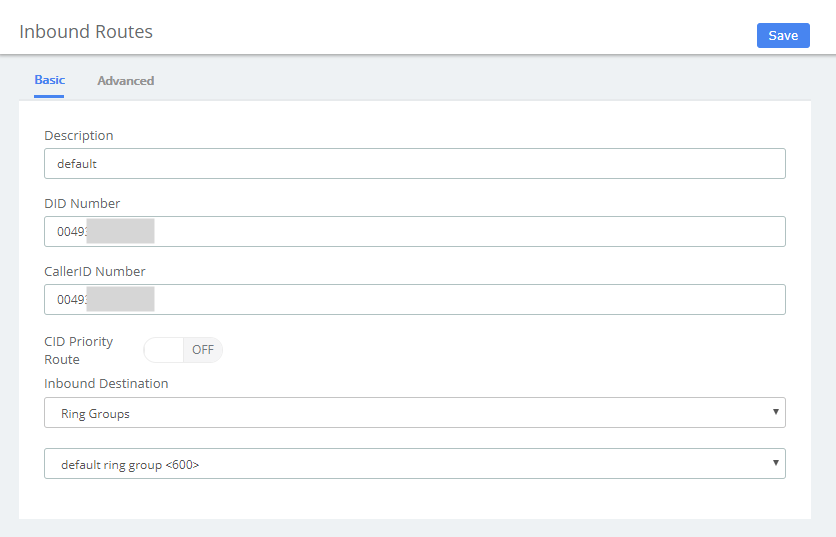
The default route destination is a ring group containing the 10 preset SIP extensions. If you want to edit it or add a new route, navigate to PBX > Call control > inbound routes, and then define what to do with calls coming into your system via any line, define the expected DID&CID number and inbound destination etc.
5. Set up outgoing routing
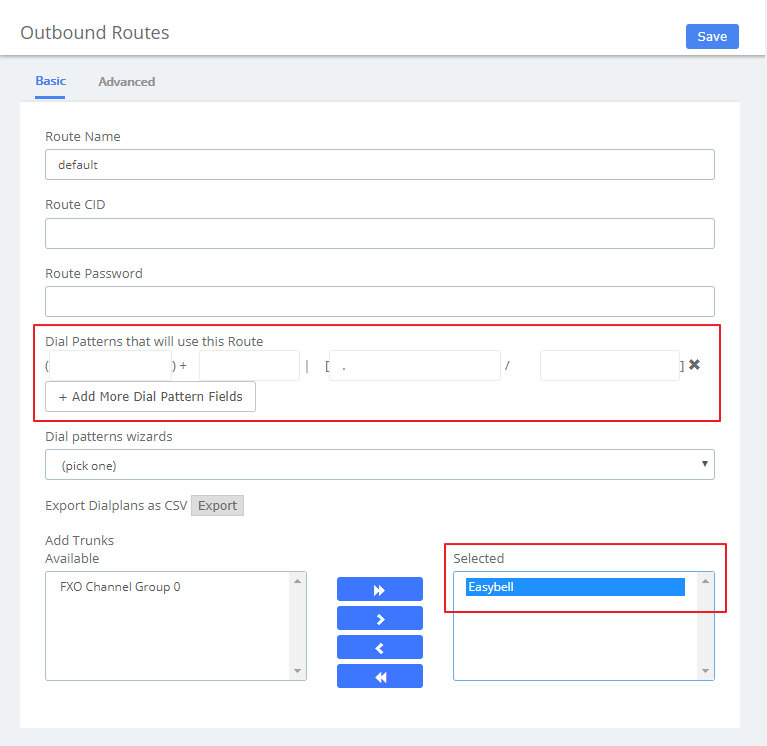
Navigate to PBX > Call Control > Outbound Routes. Here you can edit the default route. Make sure that you have selected the SIP trunk you have just created.
The outbound routes tell your system which numbers your phones are allowed to call and to which trunk the calls should be sent.
