Grandstream UCM6xxx
Manufacturer: Grandstream
Designation: UCM6xxx
Firmware: Version xxx
Website of the manufacturer: https://www.grandstream.com/
Please also note our general information on the phone number format for incoming calls.
Registration of an Easybell SIP trunk
1.1. add trunk
Call up the UCM6xxx user interface.
Click on "Extension/Trunk" in the menu on the left and then on "VoIP connection". Click on the "Add SIP trunk" button.
1.2. enter SIP access data
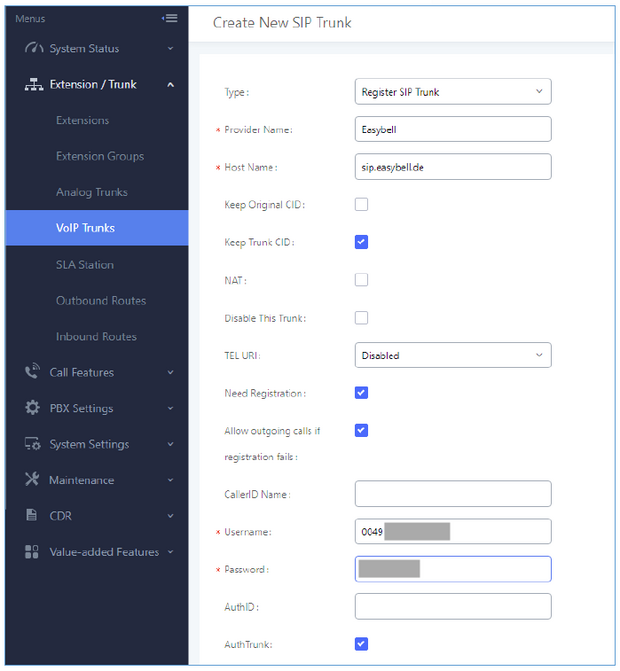
Now enter the access data for your easybell SIP trunk, similar to the following screenshot.
Type: Register SIP Trunk
Provider Name: Enter a name here, e.g. the provider name
Host Name: sip.easybell.de
User name: Your easybell SIP user name
Password: Your easybell SIP password
Now click on "Save" and then on "Carry out switch" to apply the settings.
1.3. check registration
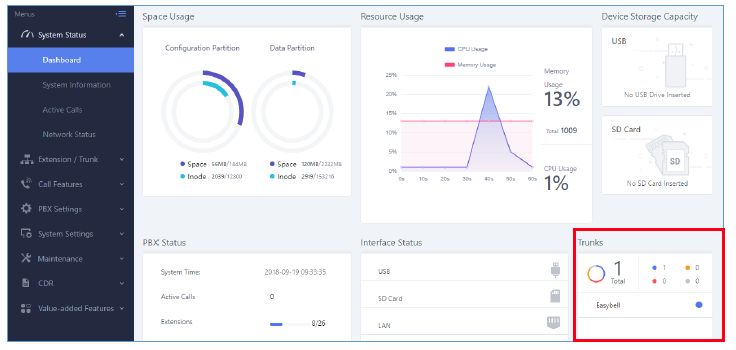
After you have made the changes, you can check whether the SIP trunk has registered successfully. To do this, click on "System status" and "Dashboard". If the dot next to the word "Easybell" is blue, the SIP trunk has registered successfully.
2. Incoming routing
2.1. call up settings
The SIP trunk must be configured and registered before configuring the inbound routes (see above). Inbound routes enable UCM to receive incoming calls via the SIP trunk and forward them to the specified address.
Please carry out the following steps to configure the inbound routes.
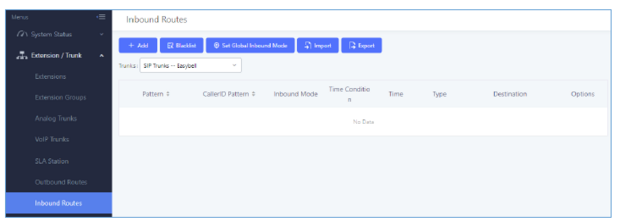
Click on "Extension / Trunk" in the menu on the left and select "Inbound Routes". Then click on the "+ Add" button to add a SIP trunk.
2.2. set incoming routing
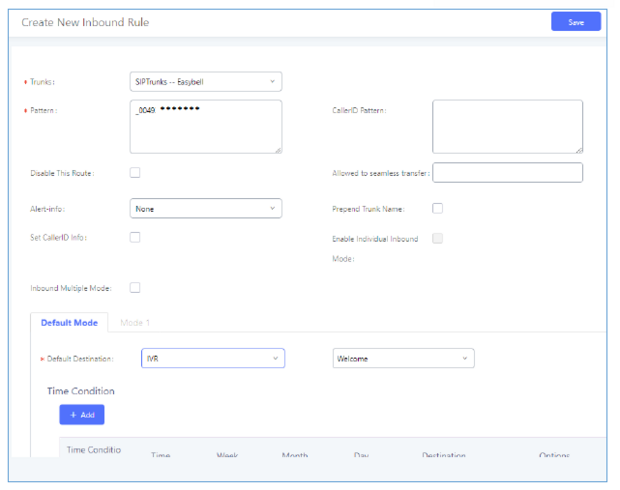
The following interface will now open, which you should fill in as follows:
Trunk: Select the easybell SIP trunk that you have just created.
DID Pattern: This is the DID that a caller has dialed to reach your UCM. This should be set according to the DID provided by easybell for your trunk. In this example it is _49...1. The underscore is required for the DID pattern and the complete phone number including the extension must be entered (in this example "1" at the end of the number).
Preset destination: The parameter is used to route a caller to a specific destination. You have the option of routing the user to an extension, call group, voicemail or call queue.
Click on "Save" to apply the changes.
3. Outgoing routing
3.1. call up settings
The SIP trunk must be configured and registered before configuring outgoing routings. Outgoing routings allow UCM users to make outgoing calls to external numbers via the SIP trunk.
Follow these steps to configure outgoing routings:
Click on "Extension / Trunk" in the menu on the left and select "Outgoing Routes", then please click on the "+ Add" button to add a SIP trunk.
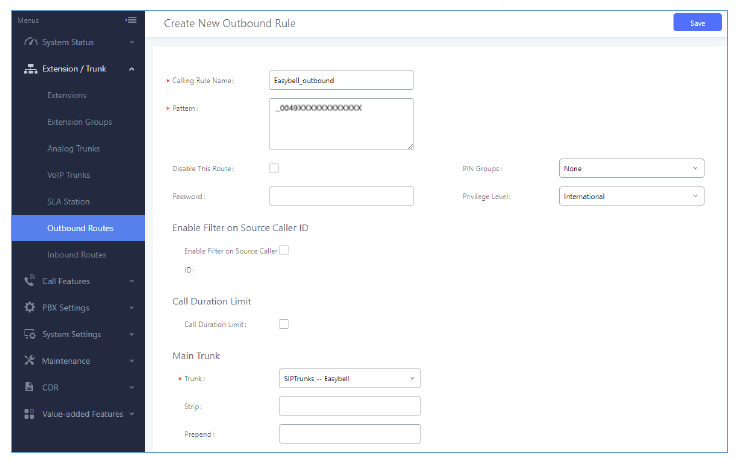
3.2. set up outgoing routing
The following interface will now open, which you should fill in as follows:
Name of the call rule: This identifies the route. For example, we set "Easybell_outbound".
Pattern: The dialing pattern is used to route the calls. The example "_0049XXXXXXXXXXXXXX" means that only calls with up to 14 digits and leading 0049 are forwarded. Alternatively, other Asterisk-compliant patterns can be used, e.g. "X." to allow all phone numbers.
Preferred levels: Set the authorization level so that only extensions with the same or higher authorizations are allowed. If this setting is set to "International", only extensions with the "International" authorization level may make calls via this SIP trunk.
Main trunk: Select your easybell SIP trunk.
Click on "Save" to apply the changes.
You should now be able to make an outgoing call to external numbers with a 14-digit length and leading 0049. Only extensions with the "International" authorization level may initiate calls via the easybell SIP trunk.
4. CLIP no screening in the telephone system
4. 1. call up settings
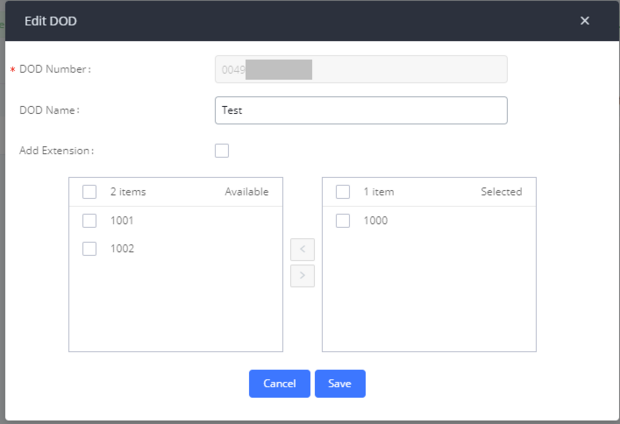
Click on the button with the telephone receiver next to the Easybell SIP Trunk to adjust the details for the DOD number and name.
4.2. edit DOD
On the next screen, you can assign a phone number to one or more extensions that will be signaled for outgoing calls. Enter the phone number at the top and then select the extensions in the left-hand box. Click on the arrow icons to move the selection to the right-hand box and activate it.
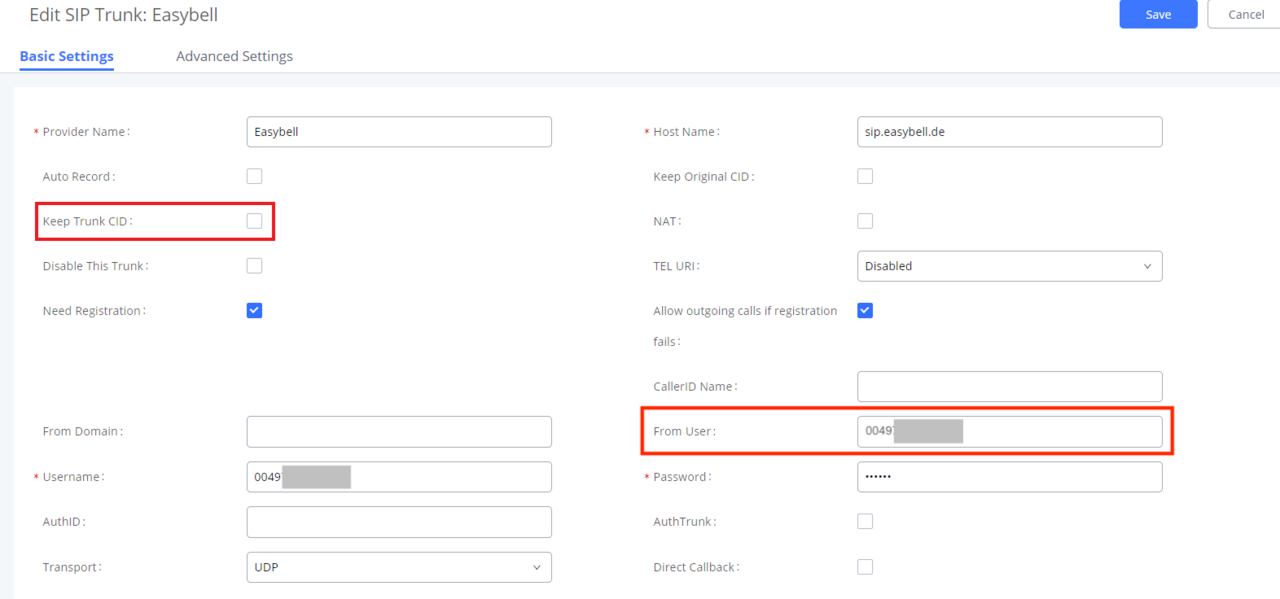
4.3. edit trunk settings (Basic)
As shown in the following screenshot, the option "Keep Trunk CID" must be deactivated in the basic settings for the easybell SIP trunk to enable the transmission of a CLIP number. the UCM automatically sends the DOD numbers in the SIP header From Username. However, as easybell requires the original caller ID there, this must be entered again in the basic settings next to "Username" under "From User".
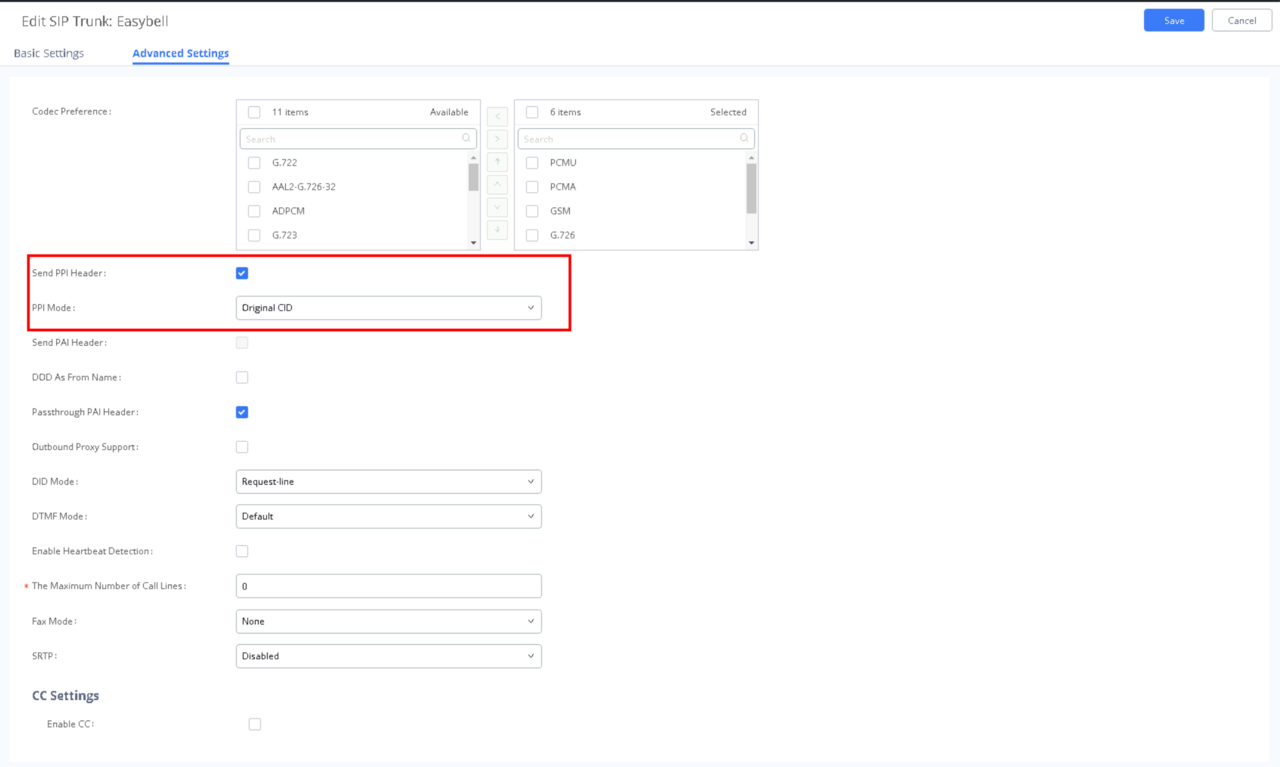
4.4. edit trunk settings (Advanced)
Now switch to the advanced settings. Activate the "Send PPI Header" option there and select "Original CID" under "PPI Mode". The UCM IP PBX then sends the caller ID of the caller in the SIP header P-Preferred-Identity (PPI) as defined above. This applies to both outgoing calls and call forwarding.
5. CLIP no screening in the Easybell customer portal
CLIP no screening (P-Preferred-Identity)
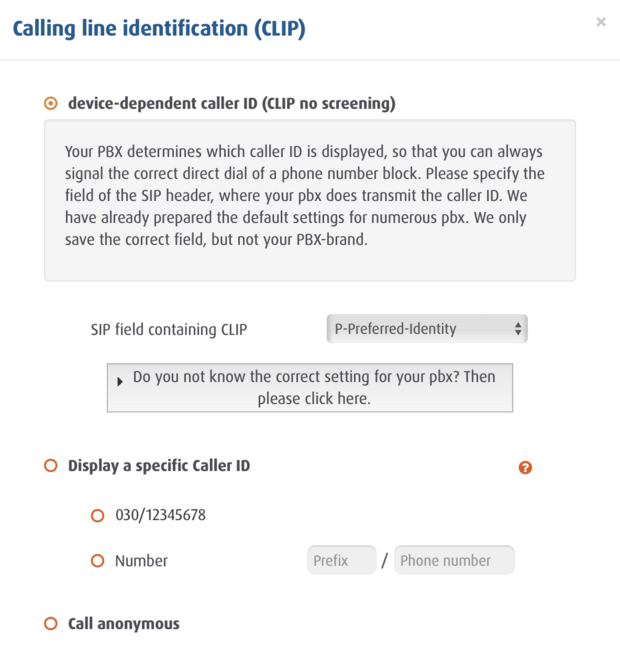
Please open the Easybell customer portal and go to "Phone settings" → "Manage numbers". Then expand the settings for the trunk you are using and click on the cogwheel symbol next to "Calling line identification (CLIP)".
In the next screen, "device-dependent caller ID (CLIP no screening)" must be activated and "P-Preferred-Identity" selected under "SIP field containing CLIP".

