Assign multiple phone numbers to a Microsoft Teams user
In Microsoft Teams (MS Teams for short) or Teams Phone, only one phone number can be assigned to a user at a time.
However, this restriction can be circumvented for incoming calls with call forwarding. To do this, you simply need to forward each additional phone number to the phone number assigned to the user.
If you use a call number block with easybell, you can easily outsource individual extensions and then configure them with such call forwarding.
These virtual extensions can be set up and configured in just a few steps.
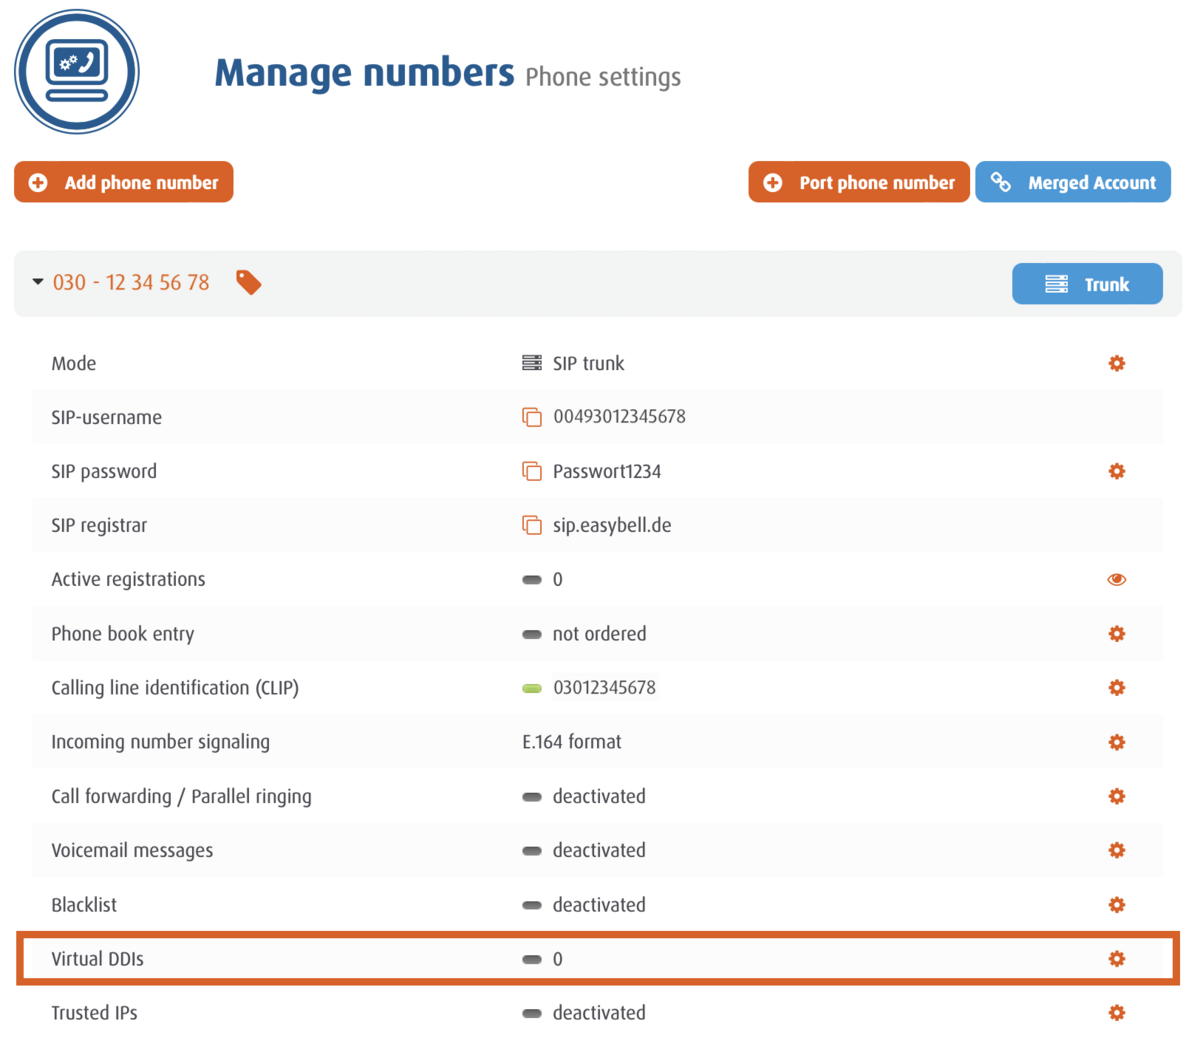
1. manage phone numbers
Log into your customer portal and in the "phone settings" area, please open the trunk that is connected to the easybell Teams Connector.
Then click on the icon with the cogwheel in the "Virtual extensions" line.
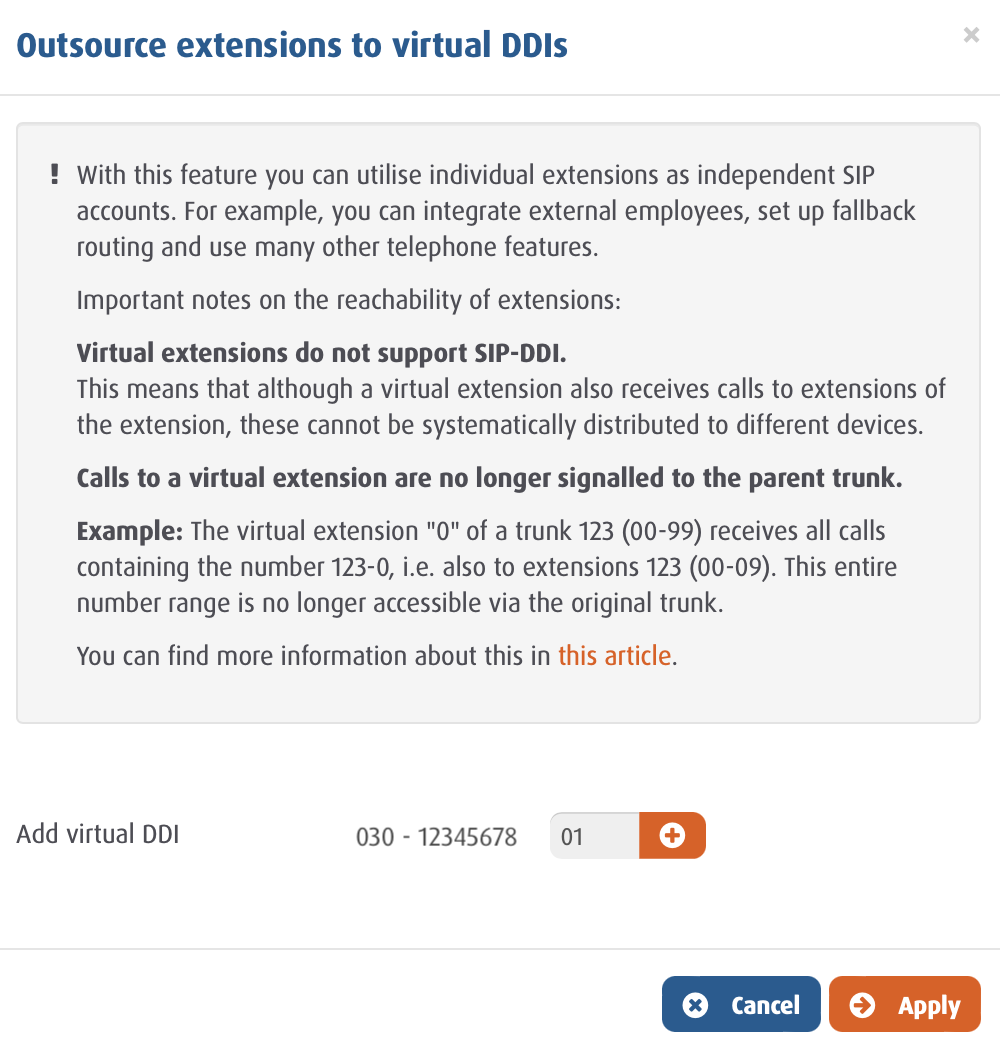
2. create virtual extension
Next, you can specify which virtual extension you want to detach from the trunk. You will also find important notes on virtual extensions here once again. Please do not forget to "apply" the settings.
We answer further questions about this function in our article "Creating virtual extensions".
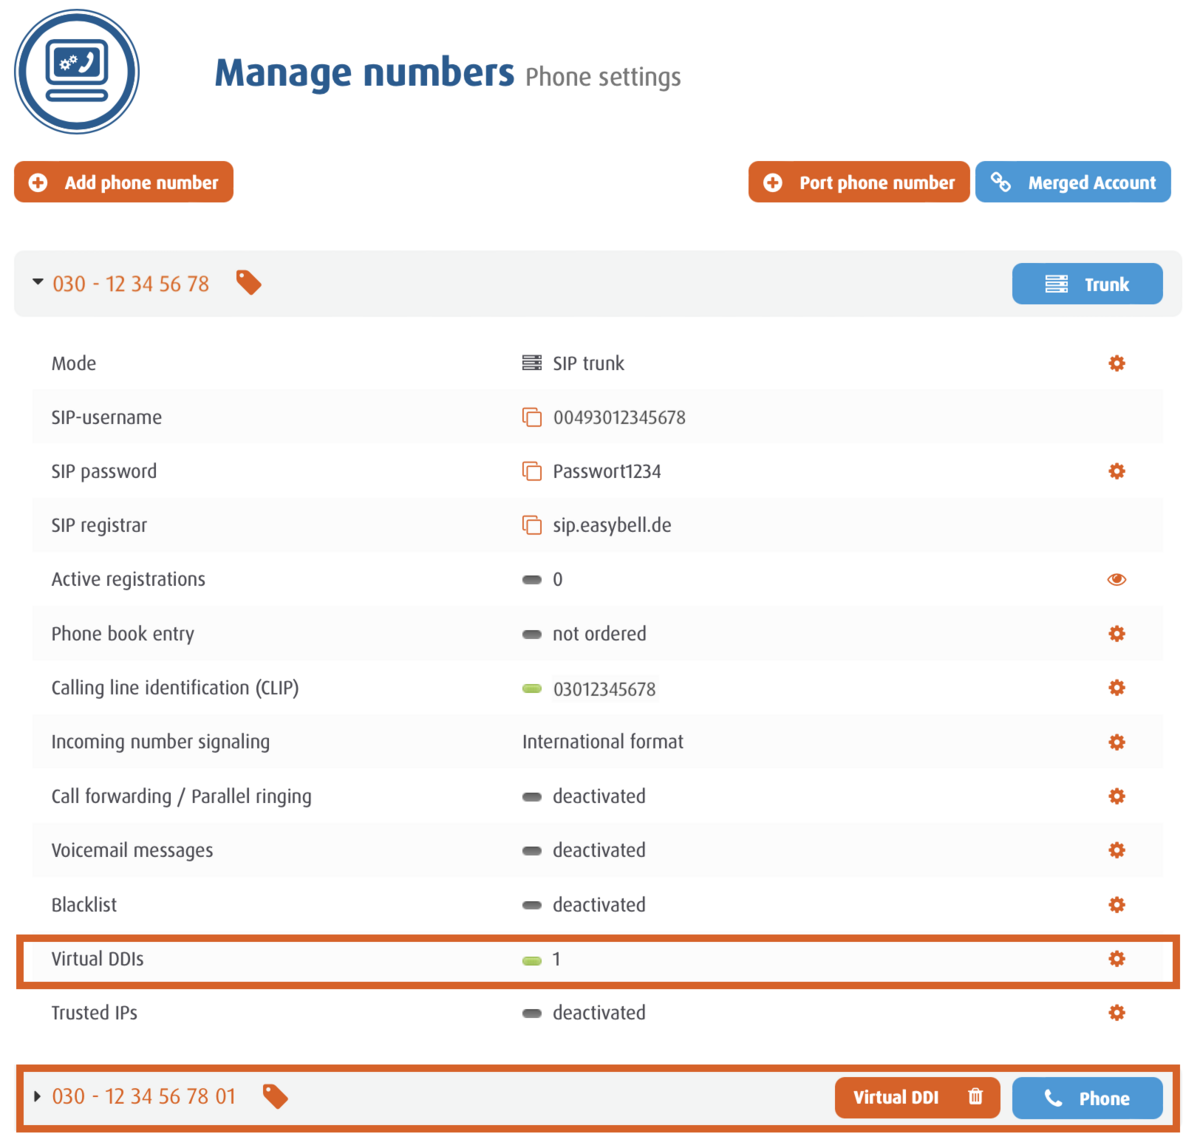
3. edit virtual extension
Back in the "Phone settings" menu, the virtual extension you just created is now displayed as a standalone SIP account. Please unfold this entry and then click on "Call forwarding/parallel call".
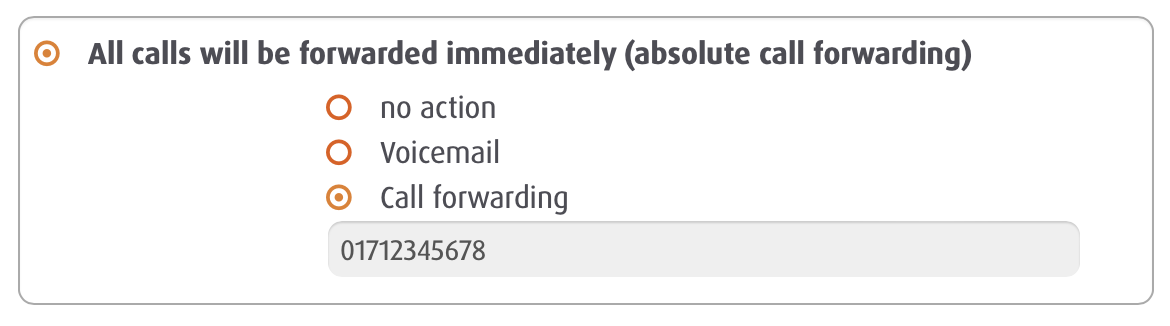
4. set up forwarding
In principle, you can use any type of forwarding for a virtual extension (for more on the different modes, see our instructions for setting up call forwarding). In this case, however, immediate forwarding is useful.
To activate this, click on "Forward all calls immediately (unconditional call forwarding)" in the "Call forwarding" section. Then enter the extension number of the team user who should receive incoming calls on this virtual extension number.
A click on "Apply" saves the settings.