Ubiquiti Unifi Talk Relay and manual configuration of Unifi devices
Manufacturer: Ubiquiti
Platform: Unifi Talk Relay
Phone models: G3 Touch Pro, Enterprise and Wall
Manufacturer's website: www.ui.com
Provisioning of telephones via Unifi Talk Relay
Unifi Talk Relay is a remote management tool for the administration and configuration of Unifi Talk phones, such as the G3 Touch Pro.
With Talk Relay you can combine the advantages of UniFi Talk with the functions and services of easybell.
Note: to use Talk Relay you need a subscription to the official UniFi hosting and third generation Unifi Talk phones.
1. installation of Unifi Talk Relay
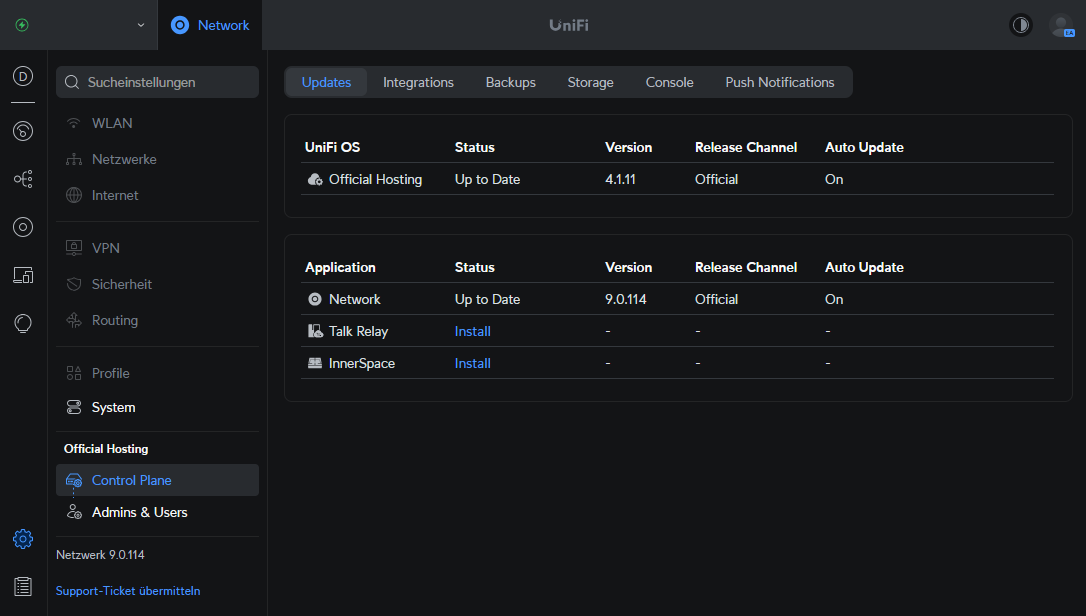
Log in to your account at unifi.ui.com and, if you have not already done so, create a location (site) to which you assign the official hosting.
Then open the site and click on the gear icon at the bottom left. Then select "Control Plane". Click on "Install" to install Talk Relay.
2. provider configuration
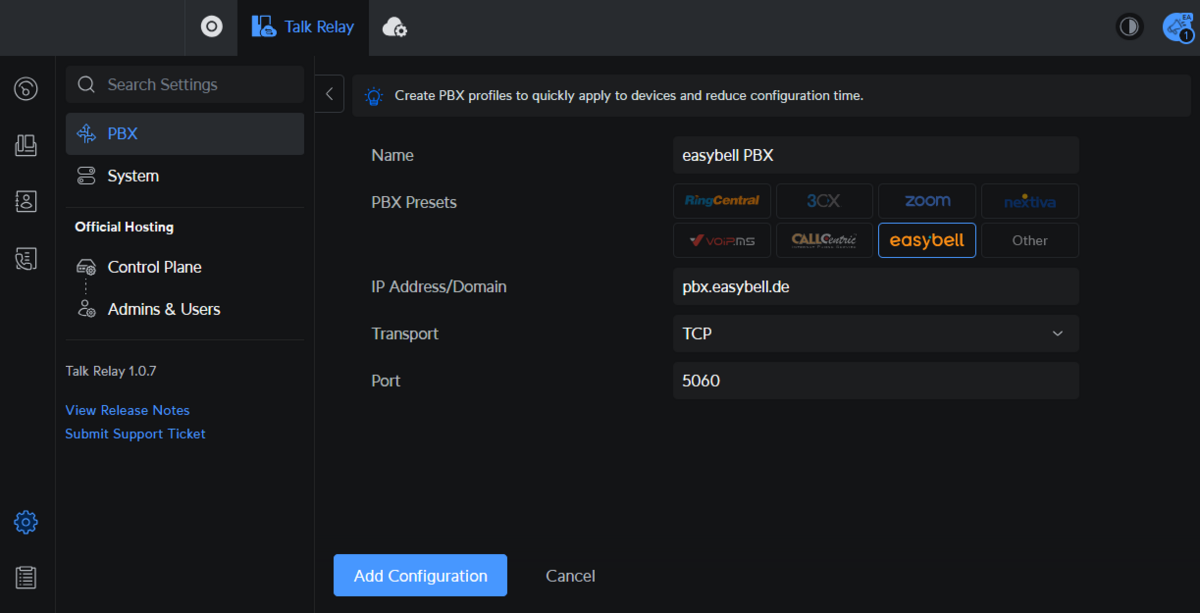
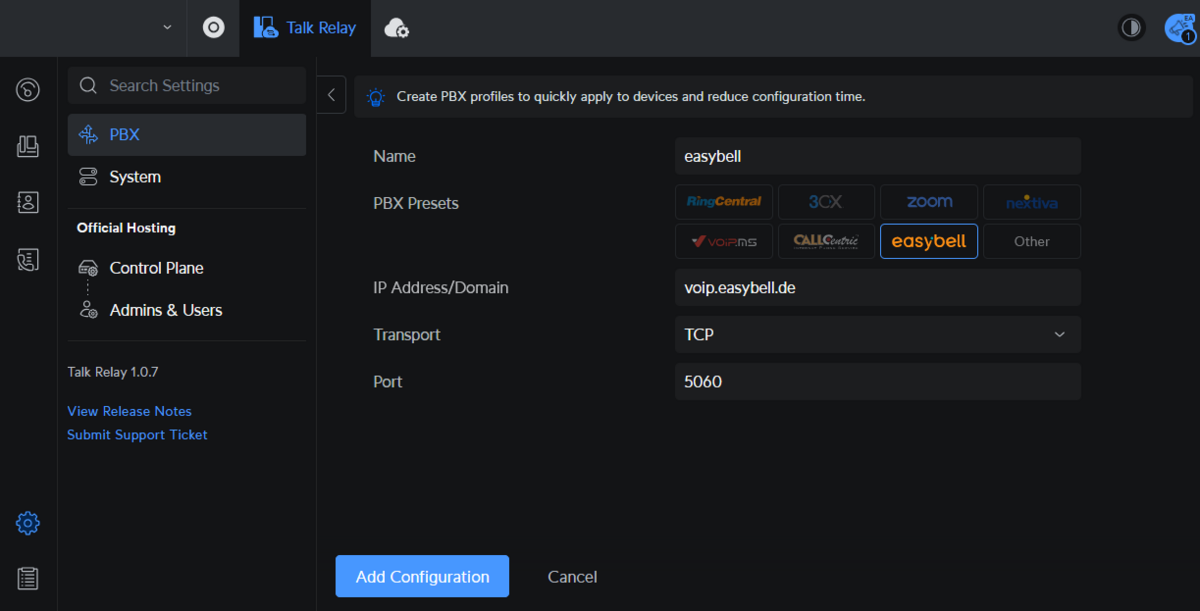
Click on the newly appeared Talk Relay icon at the top and then on "PBX". Fill in the fields accordingly - depending on whether you want to use an individual number or the Cloud PBX.
| Individual number / virtual DDI | Cloud PBX | |
|---|---|---|
| Name: | Can be freely assigned, e.g. easybell | Can be freely assigned, e.g. easybell PBX |
| PBX Presets: | easybell | easybell |
| IP Address/Domain | Adjust registrar to voip.easybell.de | pbx.easybell.de |
| Transport: | TCP (if you want to encrypt the telephony, select TLS) | TCP (if you want to encrypt the telephony, select TLS) |
| Port: | 5060 (if you want to encrypt the telephony: 5061) | 5060 (if you want to encrypt the telephony: 5061) |
3. set up the telephone

You can set up Unifi phones using the 9-digit ZTP code (Zero Touch Provisioning), which is located on the back of the device.
Switch to the Devices tab and click on Add device.
Note: If you have installed the Unifi app on your cell phone, you can also scan the QR code on the back of the phone.
Confirm with Confirm. Your phone is now displayed in the Devices list. Here you now also have the option of updating the firmware via Click to Update.
For further configuration, click on "Add" under Configuration.
Now select the previously created provider profile under PBX. Now enter your SIP access data.
Display Name: can be freely assigned
Register Name: your SIP user name / your CPBX device ID
Username: your SIP user name / your CPBX device ID
Password: your SIP password
Where can I find my SIP access data?
The SIP access data differs depending on the product. If you have difficulties finding the data, read "Where can I find my SIP access data?".
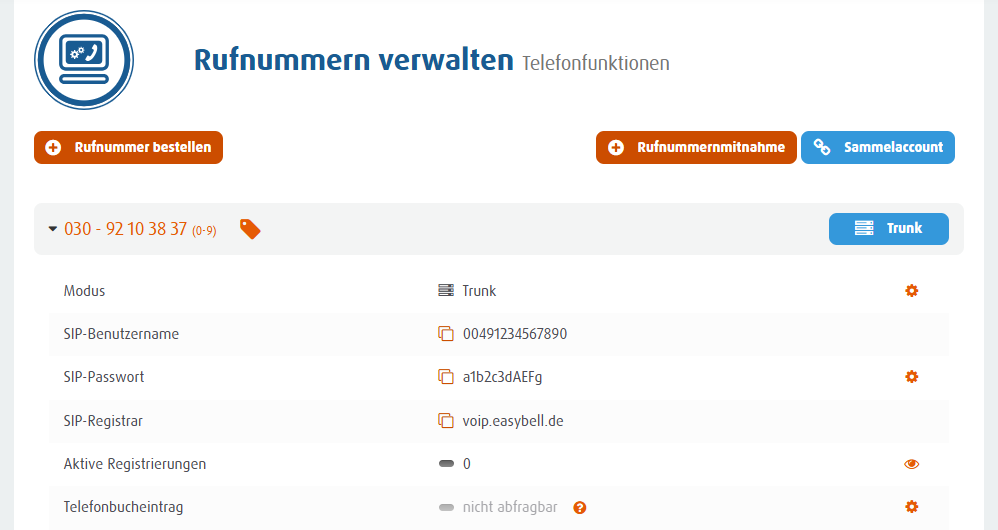
Phone numbers (blocks)
SIP access data: In the customer portal under "Manage phone numbers" in the detailed view of the respective phone numbers.
Registrar: voip.easybell.de
Cloud PBX
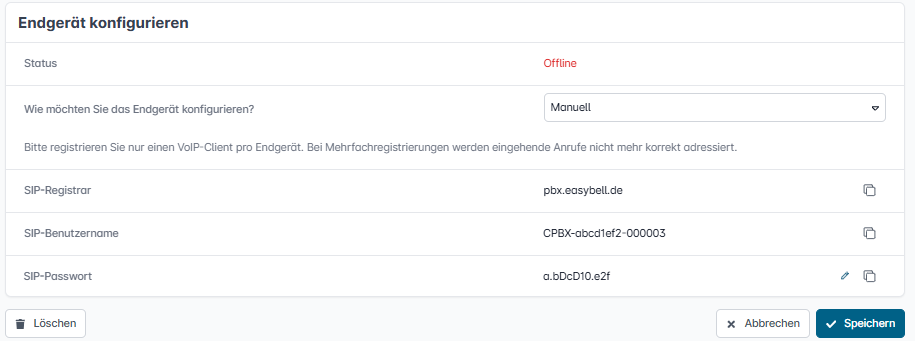
SIP access data: In the Cloud PBX in the settings of the respective device under "Configure device".
Registrar: pbx.easybell.de
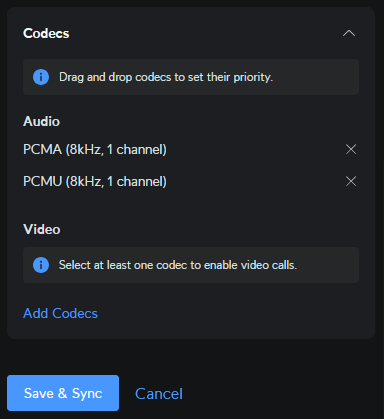
Scroll down further until you reach the codecs item. Deactivate all codecs except for PCMA and PCMU.
Then confirm with Save & Sync. The phone has now been successfully provisioned.
Manual configuration via the phone (standalone mode)
1. connecting and starting the phone
To configure the phone manually via the display on the device, first connect the phone to your network using a LAN cable. Make sure that the switch used supports PoE (Power over Ethernet) to supply the phone with power.
2. switch to standalone mode
After the phone has booted up, it will indicate that no Unifi Talk Relay configuration or Unifi router has been found.
Select the "Switch to Standalone Mode" option via the touch display.
3. select setup type
In the following window, select "Third Party PBX" to register a single phone number or a device of your Cloud PBX.
Enter your SIP access data in the following window.
Username: Your SIP user name / your CPBX device ID
Password: Your SIP password
Registrar: voip.easybell.de or Pbx.easybell.de if you use the Cloud PBX
Port: 5060 (if you want to encrypt the telephony: 5061)
Protocol: TCP ((if you want to encrypt the telephony: TLS)
Display name: can be freely assigned, e.g. Easybell
Register name: your SIP user name / your CPBX device ID
Then confirm the entries with Connect. Your phone number is now successfully registered.