Easybell app for iPhone (use with a Cloud Telefonanlage)
To set up the Easybell app for your iPhone for use with an Easybell Cloud Telefonanlage, please follow these instructions.
1. Create access data
In the first steps, we will show you how to create an end device of the "App" type and thus generate access data for the Easybell app.
If you are already familiar with this, you can skip directly to step 3.
1.1. add end device
Call up your Cloud Telefonanlage in your easybell customer portal.
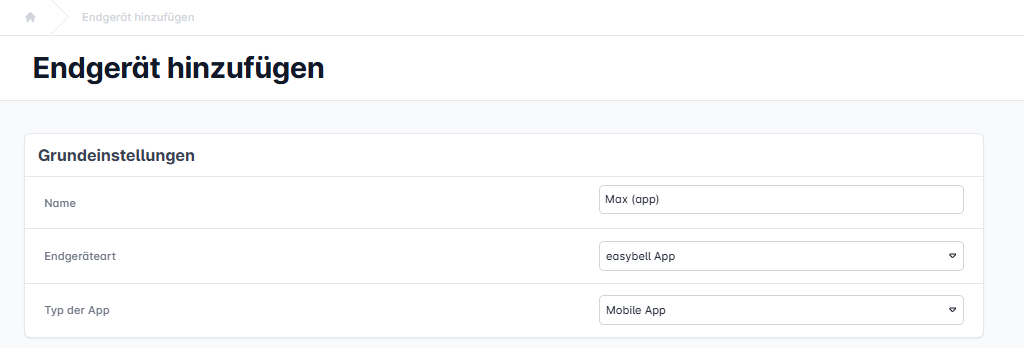
Add a new end device by clicking on the "Add" button next to "End devices".
1.2. configure the end device
In the "Basic settings", select "App" as the device type and then "Mobile".
The remaining steps are similar to the other steps for setting up end device accounts in the Cloud Telefonanlage.
Please do not forget to assign the end device to an extension.
1.3. generate access data
Click on the "Save and generate access data" button.
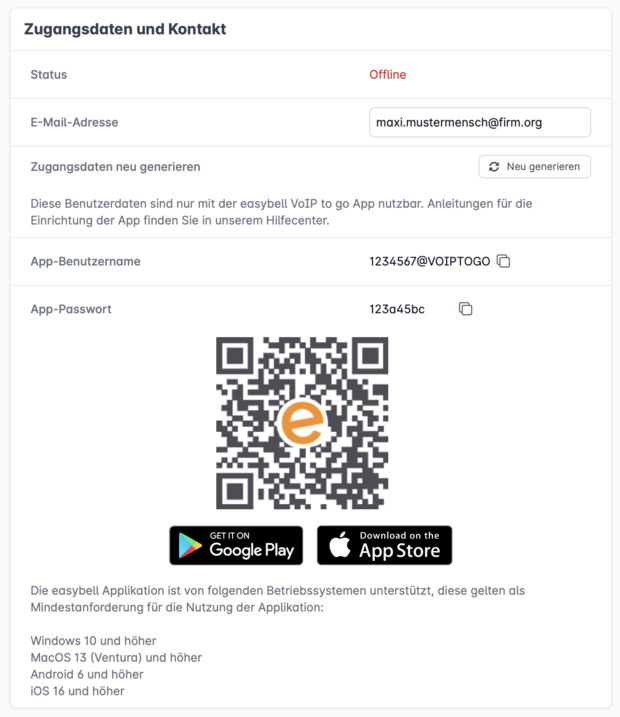
Your login data and a QR code will now be displayed.
Please leave the window open - we need the QR code in step 3.
2. Install app
Download the Easybell app from the App Store and wait for it to install.
Then open the Easybell app.
3. Scan the QR code in the app
Scan the QR code with the app or enter the displayed data manually.
Note: Only one phone number can be registered in the app.
Confirm the requested access in the app. Access to media and files is necessary for the app's recording function to work. Telephony is not possible without this access.
Note on the use of "Do Not Disturb" (DND)
In the iOS system settings, you can define caller groups that are not blocked despite "Do Not Disturb" (DND) mode being activated. This setting only applies to the iOS phone function and not to apps from other providers. To be able to make incoming calls with the Easybell app, you must deactivate DND.


