

Configure PhonerLite for phone numbers and Cloud PBX
Version: 2.88 (last tested 3.32)
Operating system: Windows
Manufacturer's website: www.phonerlite.de
With the free PhonerLite softphone, you can use VoIP telephony simply via your computer with Windows operating system without having to purchase a desk phone. You can both make and receive calls with your PC and, by using a headset, you have a convenient and inexpensive alternative to an IP telephone.
1. manual configuration
You can download the PhonerLite software from the manufacturer's website and then install it on your PC.
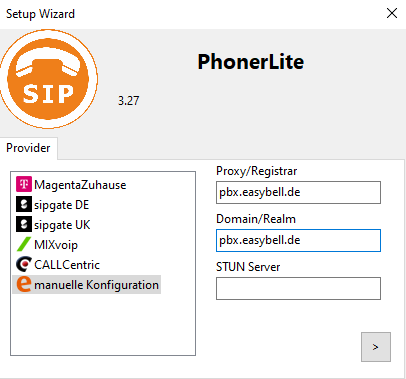
In the first step, please select ‘Manual configuration’ under ‘Provider’.
In the next two steps, you will be asked to enter your SIP login details and the registrar corresponding to your product. You can find both at my.easybell
Where can I find my SIP login details?
SIP login credentials vary depending on the product. If you have trouble finding them, please read “Where can I find my SIP login credentials?”.
Do you have a private customer plan? If so, please click on “Private”!

SIP credentials: In the customer portal, under "Telephone line" in the details view of the respective connection.
Registrar: voip.easybell.de

SIP credentials: In the Cloud PBX, go to the settings for the respective device under "Device Configuration".
Registrar: pbx.easybell.de
SIP login credentials: In the customer portal, under "Telephone line" in the details view for the respective phone number.
Registrar: voip.easybell.de

2. fill in proxy/registrar and realm/domain
Please enter your registrar under ‘Proxy/Registrar’ and ‘Realm/Domain’.
3. login data
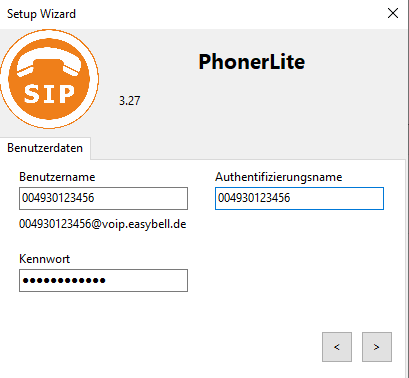
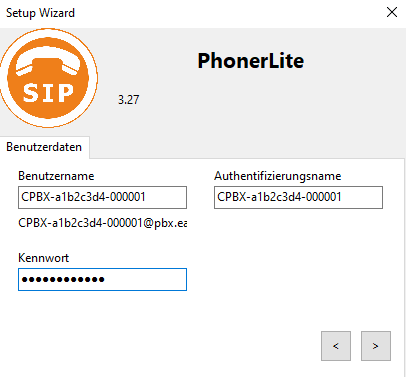
On the next screen, enter the username, authentication name and password. The username and authentication name are always the same.
Username: SIP username
Authentication Name: SIP username
Password: SIP password
Confirm by clicking the right-hand arrow.
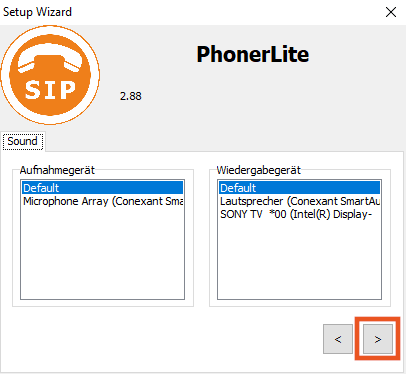
4. further settings
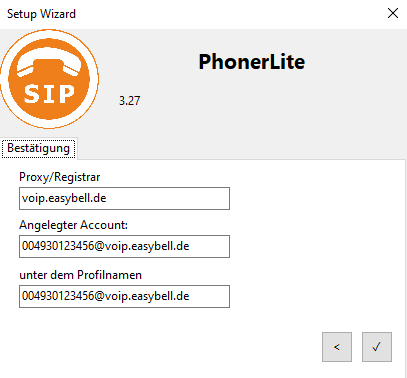
After checking the details, please click the tick at the bottom right to confirm.
In the next step, you can select the recording and playback device that you would like to use for PhonerLite.
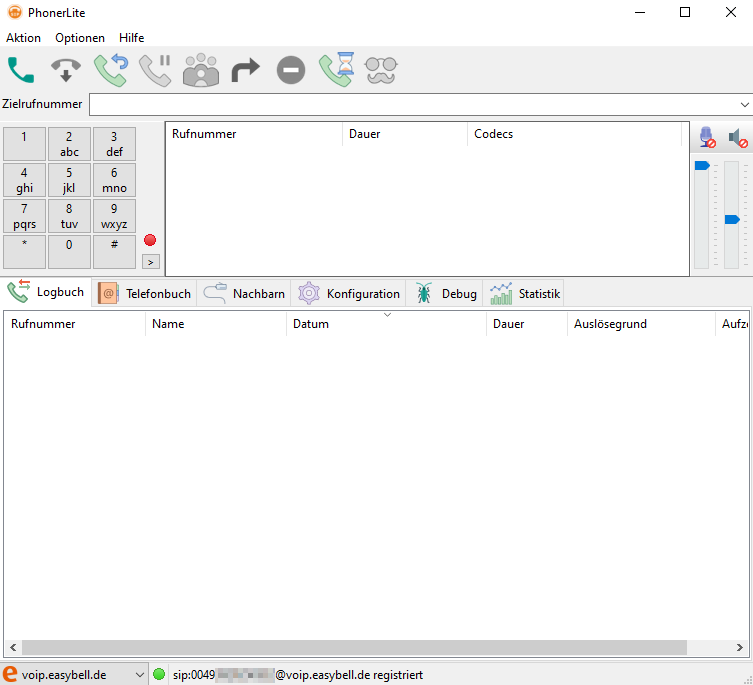
5. complete setup & check registration
You should now have successfully registered. You can recognize this by the status at the bottom of the PhonerLite window.
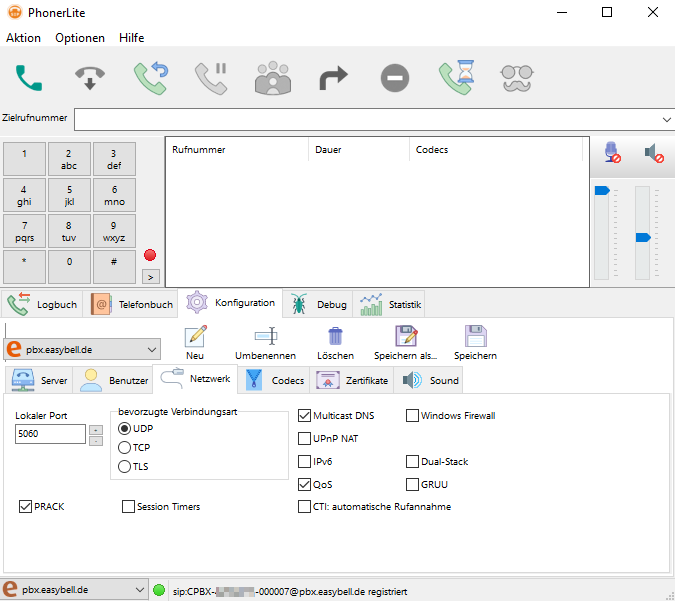
Only for Cloud PBX: Set connection type
When setting up a Cloud PBX end device, please open the network settings and make the following adjustments:
Preferred connection type: TCP
We have completely redesigned our customer portal for you.
If the steps described in the instructions differ from your situation, you'll find a PDF version of the old instructions at the end of the article.