

Set Up the FRITZ!Box as a Repeater
Manufacturer: FRITZ!
Model: FRITZ!Box
Firmware: FRITZ!OS 7 or later
Requirements
All FRITZ!Box models used in this setup must support at least FRITZ!OS 7.
Older devices and those from other manufacturers cannot be used as mesh repeaters. In this case, it is better to use a FRITZ!Repeater.
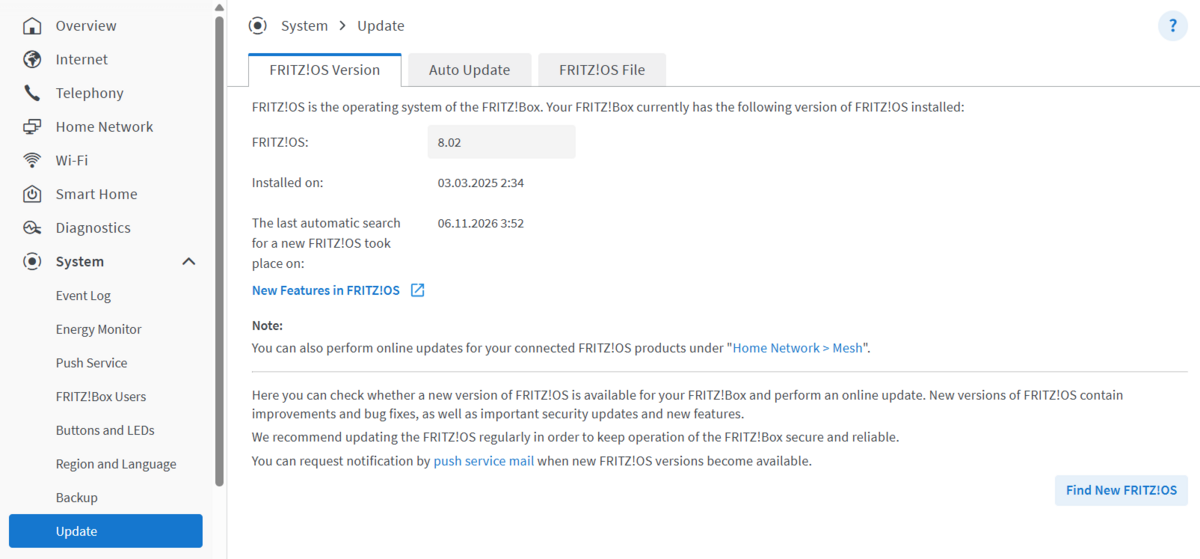
1. Update FRITZ!OS on both FRITZ!Boxes
Both devices require FRITZ!OS 7 or later. Open the user interface on each FRITZ!Box, click “System,” and then click “Update.” Install the version offered, if one is available.
If the older FRITZ!Box does not offer FRITZ!OS 7, you cannot use it as a mesh repeater. In this case, use a FRITZ!Repeater.
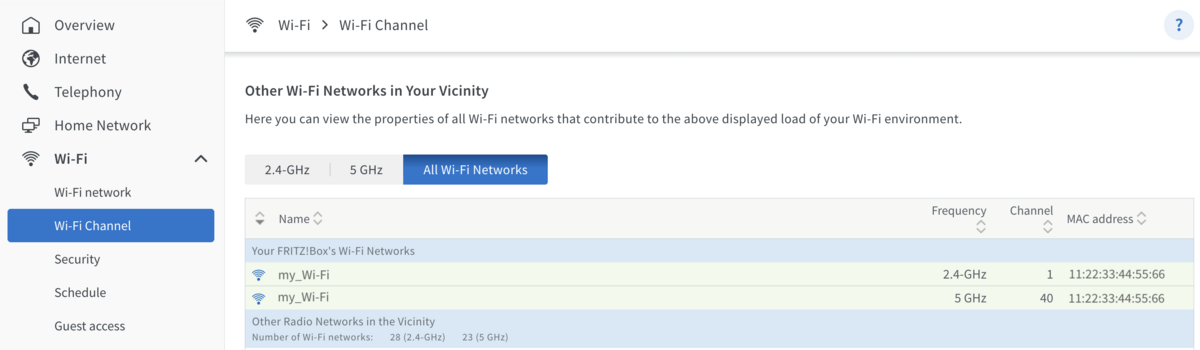
2. Write down the MAC address of the Mesh Master
You only need to perform this step if you want to connect the two FRITZ!Boxes via WiFi later. If you're connecting them via an Ethernet cable, skip this step.
Open the user interface of the FRITZ!Box that provides Internet access. Click “WiFi” and then “Wireless Network.” Under “Other WiFi Networks in Your Area,” you’ll find the MAC address(es) at the top of the list. Make a note of them—this will help you identify the correct WiFi network later if several similar entries are displayed.
3. Switch to the second FRITZ!Box
From this point on, you will only be working on the FRITZ!Box that you want to set up as a mesh repeater. Connect a computer to this device via WiFi or an Ethernet cable, and open its user interface.
Note: The computer must not be connected to the Mesh Master at the same time.
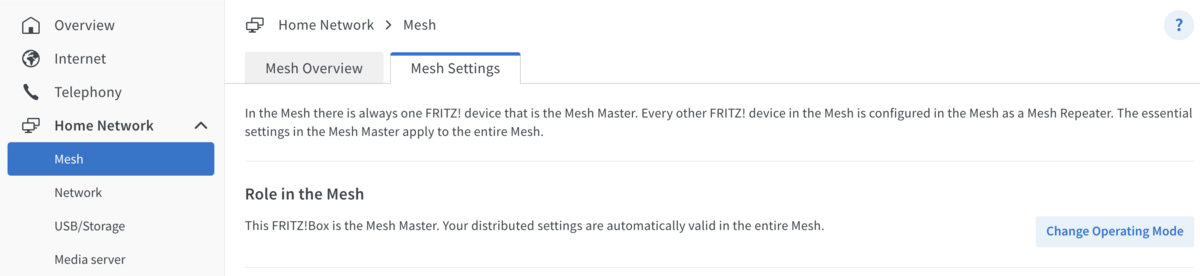
4. Open the Mesh Settings
Expand "Home Network" in the sidebar, then click "Mesh." From there, please go to the "Mesh Settings" tab.
There, under “Role in the Mesh,” click “Change Mode.”
5. Switch the operating mode to Mesh Repeater
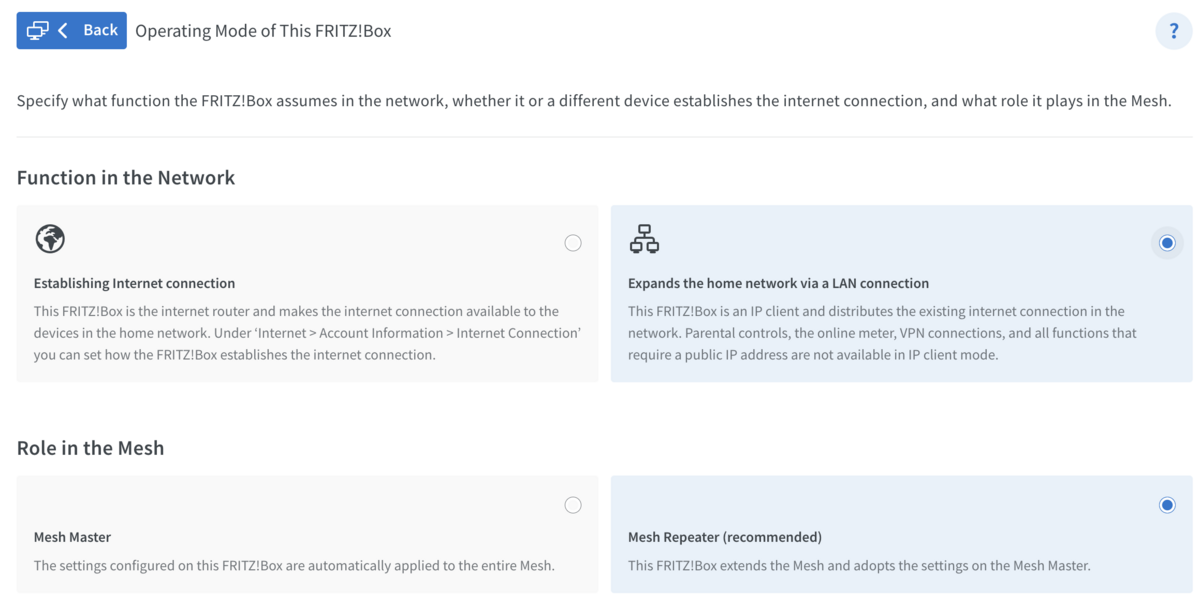
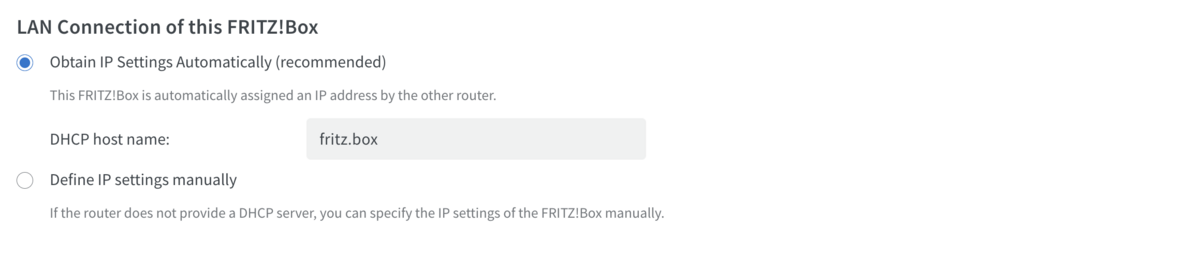
Under "Network Function," enable the "Extend the home network via a LAN connection" feature. The checkbox next to "Mesh Repeater (recommended)" will be automatically checked.
Below that, under “LAN Connections for This FRITZ!Box”, you should ideally leave “Obtain IP settings automatically (recommended)” enabled.
Then click “Apply.”
6. Select a home network connection
Next, specify how the Mesh Repeater connects to the Mesh Master.
To connect wirelessly, select the “via WiFi” option under “Home Network Access.” Select the Mesh Master’s wireless network using the MAC address you noted and enter its network key.
To connect via cable, select “Via LAN” instead. Then connect a yellow LAN port on the Mesh Repeater to a LAN port on the Mesh Master.
Click “Apply” to save.
Note: Some models support Mesh Repeater operation exclusively via network cable. Check the AVM Knowledge Base to find out which models these are.
7. Authenticate the connection using WPS
Briefly press the “WPS” button on the Mesh Repeater. The “Info” LED will start to flash. On older models, hold down the button for about six seconds until the “WiFi” LED flashes.
Then, within two minutes, press the connection button on the Mesh Master. Depending on the model, it is labeled “Connect,” “Connect/WPS,” “WPS,” or “WiFi/WPS.”
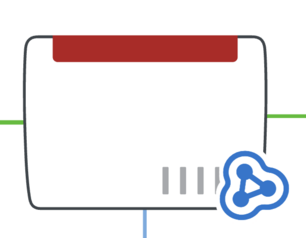
If the setup was successful, the second FRITZ!Box will appear in the Mesh Master's mesh overview with the mesh icon.
Optional: Position the mesh repeater optimally
Place the Mesh Repeater in an open area if possible—not directly behind or under an obstacle such as a cabinet or radiator, and not in a corner of the room. Make sure there are as few obstacles as possible between it and your WiFi devices.
Also, avoid placing it near metal objects, speakers, and other wireless transmitters such as microwaves, DECT phones, or baby monitors.