Using Intercom in the Cloud PBX Pro
Intercom is a feature of the Cloud PBX Pro that enables a direct voice connection to another device - without the called party having to answer the call.
The caller's voice is immediately played back via the loudspeaker of the target device and the called party can answer directly.
Typical application scenarios include offices, waiting rooms, reception areas and much more.
1. set up the intercom function
1.1 Accessing the Cloud PBX
1.2 Configuring the device

As this is a device-related function, it is configured in the device accounts. The function is set up on the target device, i.e. the telephone that is to automatically answer the call.
To do this, please click on "Change" on the device for which you want to activate the intercom function.
1.3 Activate intercom
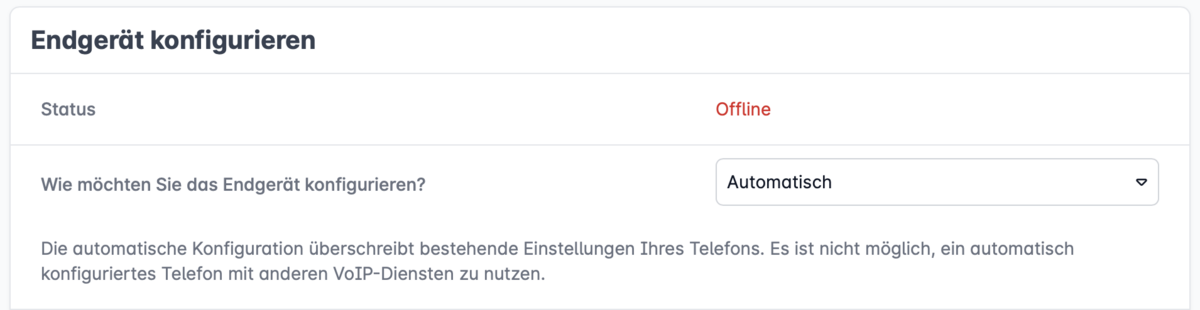
In the device settings, please scroll to the "Configure device" section.
Please make sure that "How would you like to configure the phone?" "Automatic" is selected.
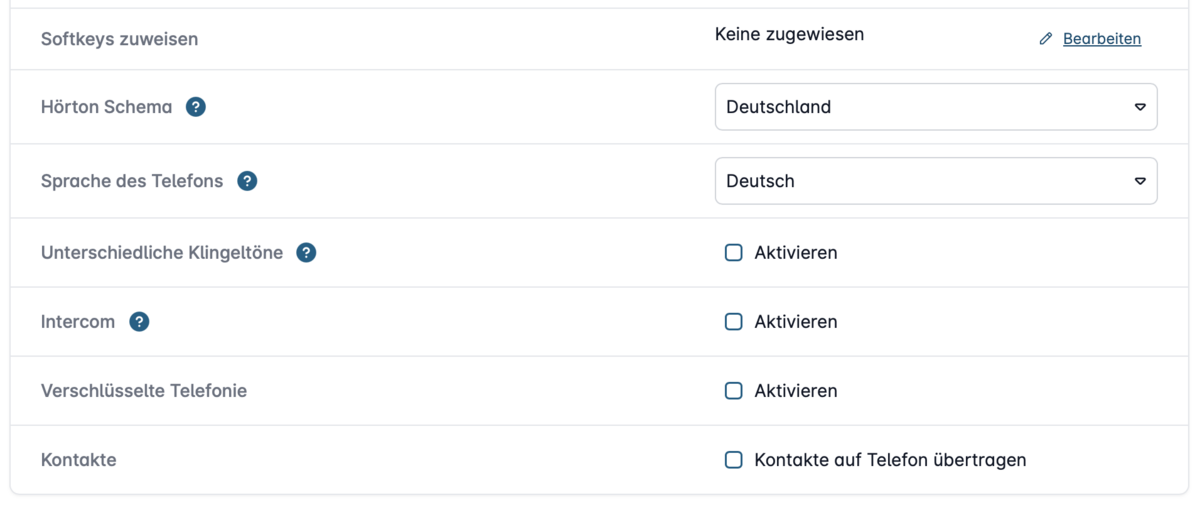
Now you can check the "Activate" box for the intercom function and then click on "Save".
1.4 Restarting the phone
In order for the setting to be adopted by the phone, it must be reprovisioned. The easiest way to do this is to briefly disconnect the device from the power supply and reconnect it.
After re-provisioning, this telephone is ready to receive intercom calls.
2. make an intercom call
To receive an intercom call, the previously edited device must be connected to an extension.
You can now start intercom calls by placing the prefix *9 in front of the extension number of the device.
Example: The device is assigned to extension 201 and is to be called via Intercom → dial *9201
3. set up intercom speed dialling
To use Intercom even more conveniently, you can configure function keys for specific target devices.
This is how it works:
3.1 Editing the calling device
Edit the end device account of the telephone to which you want to add the quick dial for Intercom.
Scroll back to the "Configure device" section and first make sure that automatic setup is activated.
Click on "Edit" under "Assign softkeys".
3.2 Add softkey
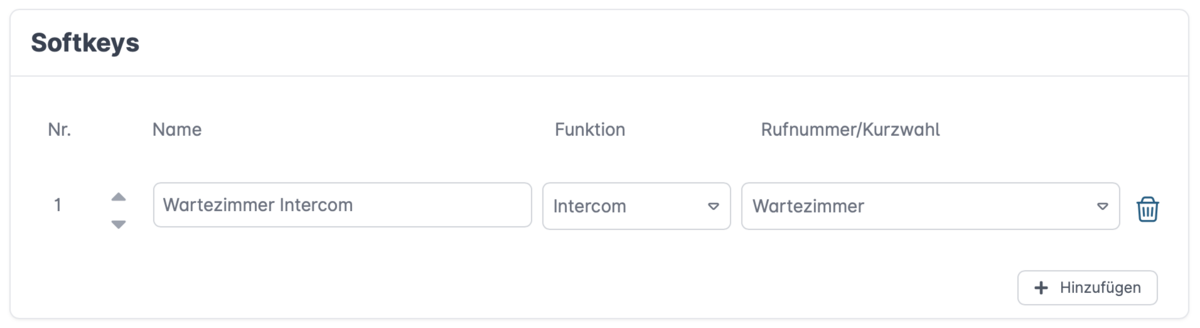
Click on the plus sign to create a new softkey and enter the following details:
- Name: Assign a meaningful name.
- Function: Intercom
- Phone number/speed dial: Select the desired extension from the drop-down menu (Only extensions to which a device with an active intercom function is assigned are displayed).
Save the setting and provision / restart the device.
Allgemeine Hinweise
- Bei Intercom handelt es sich um einen gezielten Anruf von einem Endgerät zu einem anderen Endgerät. Der aktive Anruf wird auf dem Zielgerät durch ein akustisches Signal angekündigt. Direkt im Anschluss werden der Lautsprecher sowie das Mikrofon des Zieltelefons aktiviert. Es findet eine bidirektionale Audiokommunikation statt.
- Es sollte stets darauf geachtet werden, dass immer nur ein Telefon, welches als "Intercom - Zieltelefon" konfiguriert ist, in einer Nebenstelle zugewiesen ist. Trifft dies nicht zu und es sind mehrere Geräte einer Nebenstelle zugewiesen, kann nicht garantiert werden, welches der Geräte am Ende den Anruf annimmt.
- Sollen reine Durchsagesysteme umgesetzt werden (z.B. Arztpraxen), empfehlen wir den Einsatz von dafür geeigneten Durchsagesystemen wie z.B. das Snom PA1 System. Dabei handelt es sich um ein SIP-Telefon, welches direkt einen Lautsprecherausgang besitzt, aber kein Mikrofon. So ist die Möglichkeit der Durchsage zwar gegeben, aber es entsteht kein rückwärtiger Audiostrom.