Instructions for the Call Flow Creator
Call flows are built using connectors and modules on the workspace.
Connectors define the conditions under which the next module is triggered.
Modules specify the action that follows, such as ringing, waiting loops, voicemail, key menus, inquiries, and more.
Below, you'll find a step-by-step guide on how to create and configure a call flow.
Call Flow Assignment to an Extension
Each Call Flow is assigned to a specific extension — either a phone number or an internal extension number.
If a Call Flow forwards a call to another extension, that extension’s configuration will take effect.
Important:
If forwarding is separately configured on the destination extension, the original Call Flow will lose control of the call.
To avoid conflicts, we recommend not configuring additional forwarding or other call-handling rules on extensions used within Call Flows.
Cloud PBX Setup
Step 1: Create an Extension
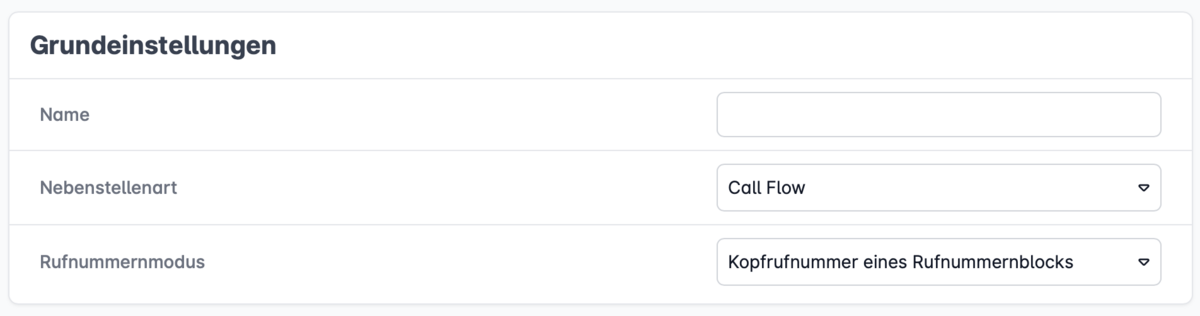
To access the Call Flow Creator, create a new extension in your Cloud PBX and select the extension type “Call Flow” under Basic Settings.
You can then choose a phone number mode and assign a name.
We recommend using a clear and unique name relevant to the purpose of the flow.
Step 2: Assign a Phone Number
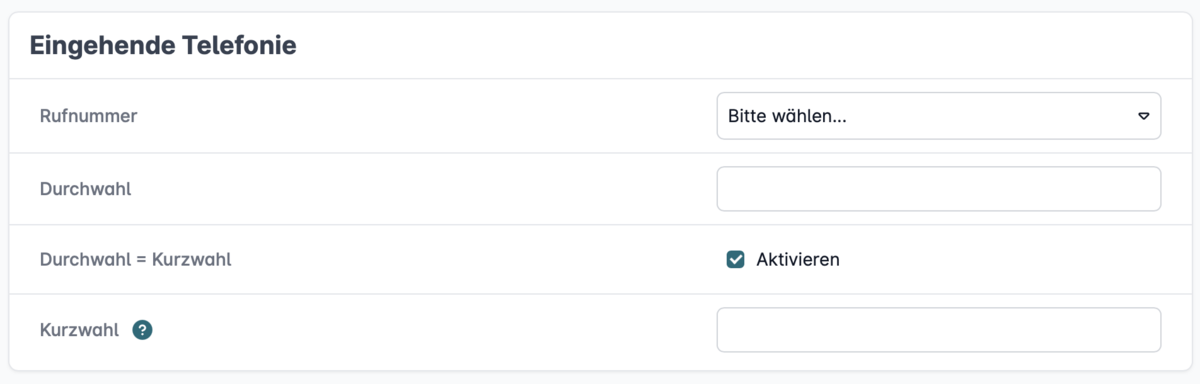
In the Incoming Telephony section, select the phone number that should trigger the Call Flow.
If the number is part of a block (number range), define the specific extension and assign a speed dial number for internal access to the Call Flow.

Step 3: Open the Call Flow Editor
You can now open the Call Flow Editor by clicking "Edit" next to "Call Flow". This launches the Call Flow Creator workspace.
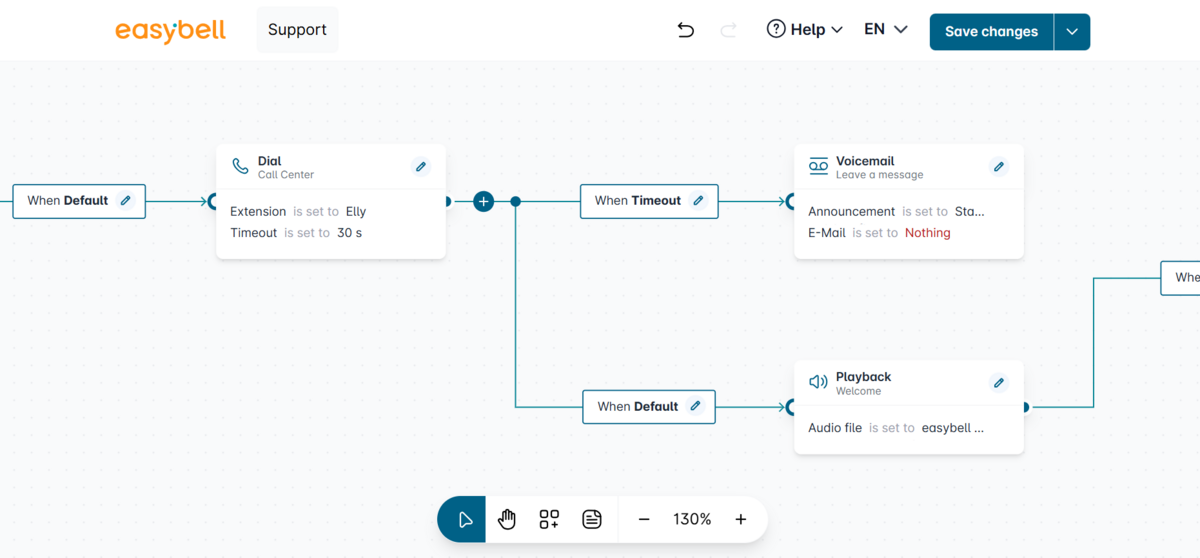
The The Workspace (canvas)
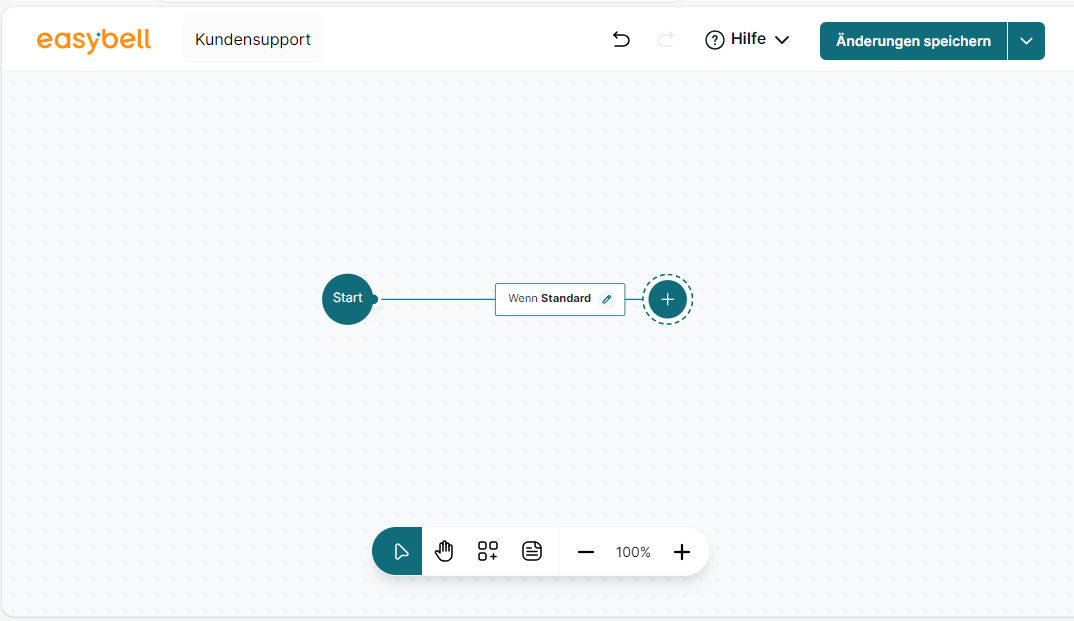
The workspace features:
- A header bar at the top
- A toolbox at the bottom
By default, the starting point and the first connector are already placed on the canvas.
Header Bar (Main Bar)

The header provides general information and actions:
Name – Displays the name of the current call flow.
Undo/Redo – Reverse or repeat recent changes.
Help – Access the Help Center, contact Easybell support, or view tutorials on common call scenarios.
Save Call Flow – Save your current configuration.
Import/Export Call Flows (.json format) –
Exported call flows can be reused in other Cloud PBX instances or extensions.
Important: If module settings in the imported flow conflict with system settings (e.g., statically assigned agents in a queue), they will be reset to default values during import.- Clean Up Workspace
- Download Function Codes - allows you to generate a list of all relevant function codes for manual telephone setup.
This includes codes for manual call routing, agent logins/logouts, and other programmable functions for each device.
The Toolbox

The toolbox provides essential tools for creating and managing call flows. Each symbol represents a specific function:
Pointer – Allows you to place and edit objects on the workspace. Click on configuration points to adjust their settings.
Hand Tool – Enables workspace navigation. Click and drag to reposition the view as needed.
Modules – Opens the module selection slideshow, where you can choose function modules. The slideshow provides both an overview and a detailed view.
Notes – Lets the call flow administrator add comments for better organization.
Zoom Level – Use the plus and minus buttons to zoom in or out on the workspace for better visibility.
The Modules

Modules are the building blocks of a call flow. You can add a module to the workspace by dragging it or clicking on it. To configure a module, click the Edit icon (pencil) to open its detailed properties. Depending on the module type, different settings may be required.
Key Features of Modules:
Custom Naming – Each module can be renamed, and the name will appear in its header, improving clarity and ease of maintenance.
Connectors for Flow Expansion – Modules can be linked using connectors to extend the call flow. When a final point (module or connector) is reached, the call ends. If you want to add steps such as an interview or call forwarding, you must explicitly define them within the Call Flow Creator.
Audio Files in Call Flows – Any audio files used in the Call Flow Creator must be stored in the cloud telephone system as "IVR, waiting loops & call flow audio", regardless of their specific purpose.
Available Modules:
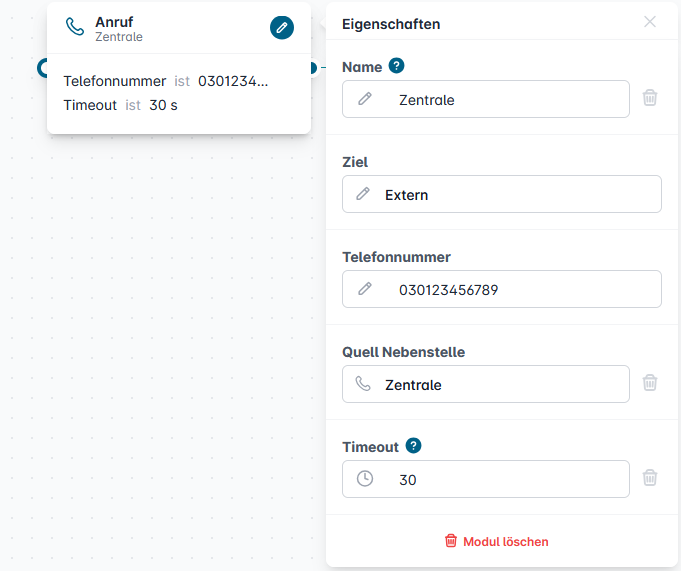
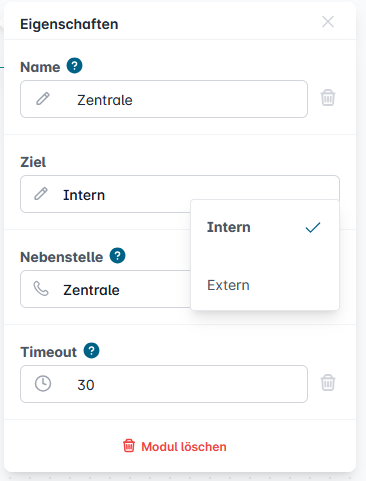
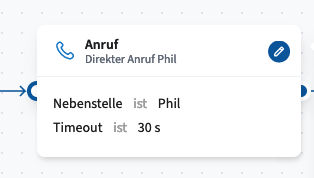

Dial
The Dial module redirects incoming calls to a specified destination. Calls can be forwarded either externally to a manually entered phone number or internally to an extension selected from the drop-down menu in the module properties.
Timeout Configuration
You can set a maximum ringing duration (in seconds). If no timeout is defined, the call will continue to ring until it is answered or the caller hangs up.
Available Connectors and Their Functions:
Timeout – The call was not answered within the configured time.
Busy – The selected extension is currently in use.
Accepted – The call has been successfully answered.
Standard – Applies if none of the other conditions are met.
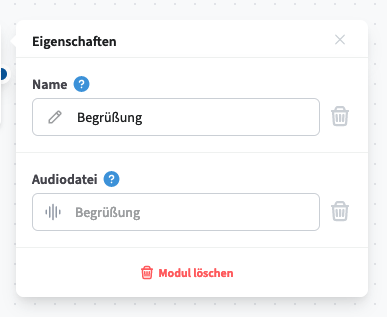
Play
The Play Audio module plays a pre-recorded audio file to the caller when triggered. The file must be selected from the pool of audio files stored in the cloud telephone system under the type "IVR, queue & call flow audio".
Available Connector and Its Function:
Standard – Triggers after the audio file has finished playing.

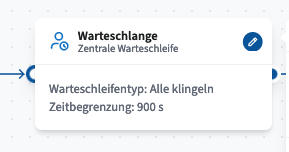
Waiting Loop
The audio file that is played to the caller can be selected in the queue module, and the signaling between agents can be prioritized.
Queue Type:
The ringing scheme is configured here. The available schemes include:
All Ring – All agents are signaled simultaneously.
Longest Time Not on the Phone – Agents who have been inactive the longest are signaled first, one after another.
Fewest Calls – Agents with the lowest call count are signaled first, one after another.
Random – Available agents are signaled randomly, one after another.
Sequential – Agents are signaled in order, either from the static list or by registration order for dynamic queues.
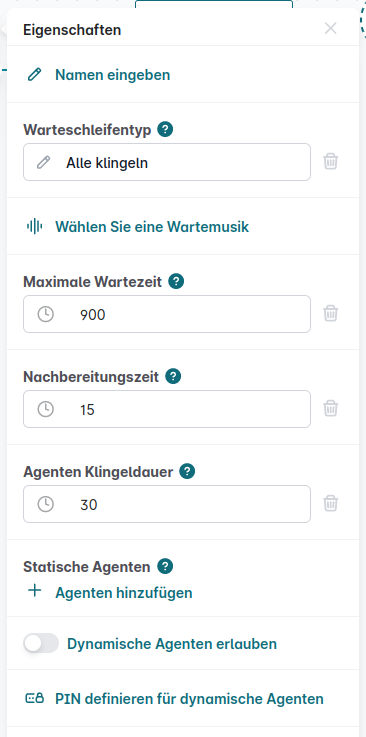
Additional Settings:
Music on Hold – Select an audio file from the system’s pool to play while the caller waits.
Maximum Waiting Time (Timeout) – The maximum time a caller can remain on hold before the system takes further action.
Follow-Up Time – The time (in seconds) an agent has after finishing a call before receiving another. (Not applicable to the All Ring queue type.)
Agent Ring Duration – The time (in seconds) an agent is signaled before the call is passed to the next agent. (Not applicable to the All Ring queue type.)
Agent Management:
Static Agents – Devices permanently assigned to the queue; agents cannot log in or out.
Dynamic Agents – Agents can log in and out of the queue.
If enabled, a function key can be provisioned via the CTA in telephone accounts.
Alternatively, a list of function codes can be downloaded from the header bar for manual configuration.
Agents can also log in or out by calling the module’s assigned number plus the last 6 digits of their device ID.
Available Connector and Its Function:
Timeout – Triggered if the call is not answered within the configured waiting time.
Queue Priority
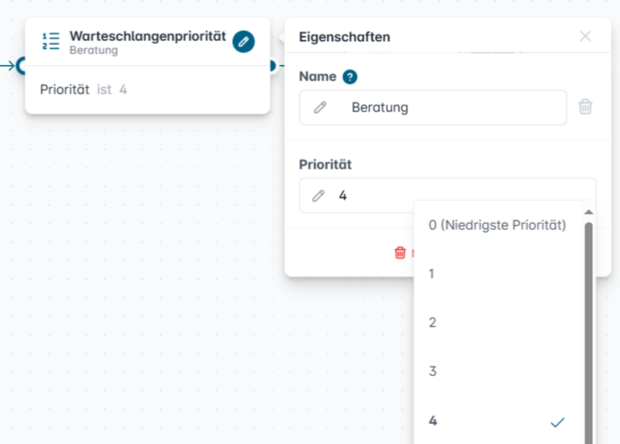
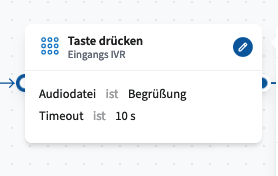
Press Button
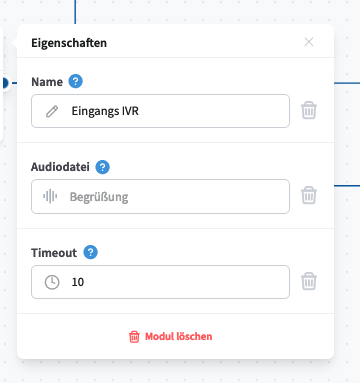
The Press Button module is used to create a classic voice menu (IVR), allowing callers to select an option by pressing a number key (0–9).
Configuration:
Audio File Selection – Choose an audio file from the cloud telephone system’s pool (file type: IVR, waiting loops & call flow audio).
Input Timeout – Define the time limit within which the caller must make a selection. The countdown begins once the audio file has finished playing, but callers can still make a selection while the message is playing.
Available Connectors and Their Functions:
Key Press (0–9) – Triggers the corresponding action when a specific key is pressed.
Invalid – Activates when an undefined key is pressed (no dedicated connector exists).
Timeout – Activates when no input is detected within the set time.
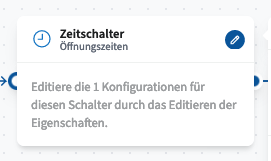
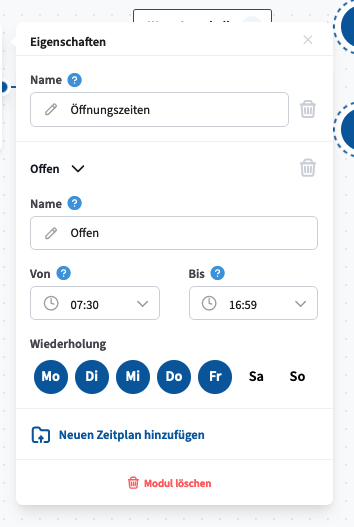
Timer Switch
The Timer Switch module enables time-based call routing by filtering incoming calls according to the time of day and day of the week. Calls can be routed differently depending on whether they occur during or outside defined periods (e.g., business hours vs. after hours).
Configuration:
Create one or more schedules with defined start and end times and select the applicable days of the week.
The module operates in the UTC+2 time zone.
Available Connectors and Their Functions:
Within – Activated when the call occurs during a configured time period.
Outside – Activated when the call occurs outside the configured time periods.
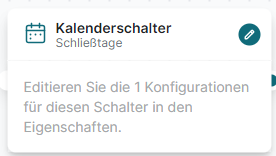
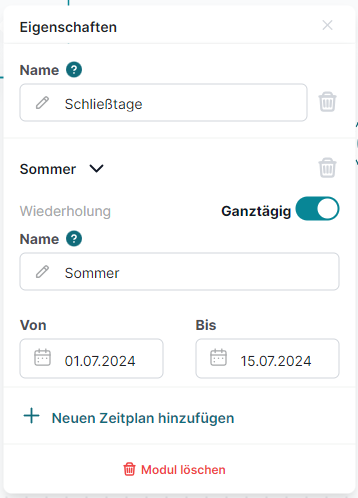
Calendar Switch
The Calendar Switch module enables date-based call routing, filtering calls by specific dates (and optionally times) and forwarding them accordingly.
Example: To account for public holidays in addition to business hours, you can place this module after a Timer Switch module and connect it to its Within connector.
Configuration:
Create one or more schedules with defined start and end dates.
Choose between “all day” or a specific time window within the given date.
Available Connectors and Their Functions:
Within – Activated when the call occurs on a configured date (and within the specified time, if applicable).
Outside – Activated for all other dates or time periods.
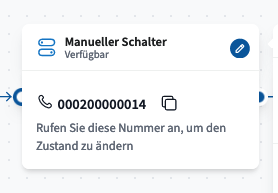
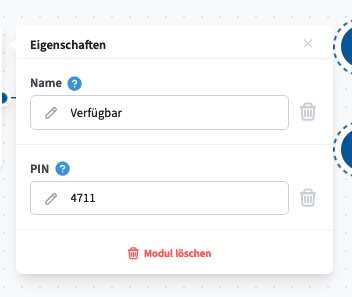
Manual switch
The Manual Switch module allows users to manually toggle call routing on or off, with or without a PIN. Its status can be displayed on supported telephones and changed as needed.
Configuration & Usage:
The module provides a function code that can be copied directly from the interface.
Supported telephones can be provisioned with the Manual Switch via the Cloud PBX.
Alternatively, a list of function codes can be downloaded from the header bar for manual configuration.
The switch can also be toggled by calling the number displayed in the module.
Available Connectors and Their Functions:
Active – Triggers when the switch is set to ON.
Inactive – Triggers when the switch is set to OFF.
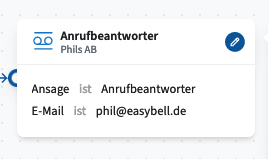
Answering Machine
The Answering Machine module redirects incoming calls to voicemail.
How It Works:
An audio file (selected from the system’s IVR, waiting loops & call flow audio pool) is played to the caller.
The caller’s message is recorded and saved as an audio file.
The recorded message is sent via email to the address specified in the module.
No connectors are available for this module.

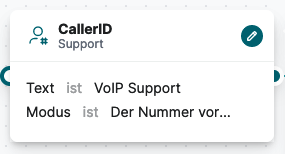
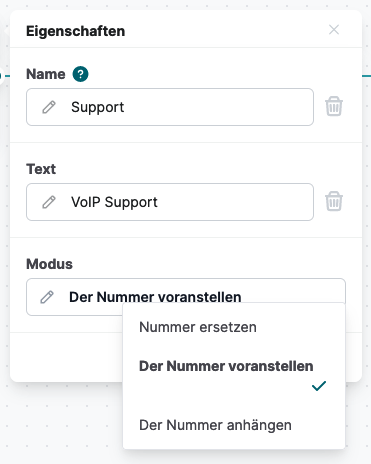
CallerID
The CallerID module allows you to prefix, replace, or append information to an incoming caller’s number. This helps employees gain additional context about the caller directly on their phone display.
Use Case Example:
An employee logged into multiple support queues can use this module to identify which queue the call is coming from. This way, they can decide how to handle the call based on the displayed information.
Key Benefits:
✔ Enhances caller identification
✔ Improves call handling efficiency
✔ Ideal for call centers or businesses where call context is crucial