OpenVox UC Series IP PBX version 2.4.2
Manufacturer: OpenVox
Product name: UC300/500
Firmware: Version 2.4.2
Manufacturer website: openvox.cn
This manual is aimed at guiding you to set up the OpenVox UC Series IPPBX with the SIP Trunk of the easybell provider smoothly.
Please also note our general information on the telephone number format for incoming calls.
Important: Currently, we have no information from the manufacturer regarding which SIP header is used for transmitting the number in case of CLIP no screening. The correct SIP header needs to be specified accordingly in the easybell customer portal. To do so manually, go to the calling line identification settings in the number management section. In order to learn which SIP header needs to be used, please contact your PBX vendor or installation partner.
Set up SIP Trunk
Navigate to PBX > Trunks, select SIP Trunk after that click Add to create a new SIP trunk so that you can send calls out to and receive calls in from that system/device.

Then make settings as follows:
- Trunk Mode: Client
- Trunk Name*: Any name you like, note that distinguish it from other trunks
- Host*: sip.easybell.de(The SIP registrar provided by easybell)
- Username: The SIP user assigned by easybell
- Secret: The SIP password assigned by easybell
The Register String will be generated automatically. Other parameters have been set by default.
In the following screenshot you can see the filled parameter:

After applying these settings, you could find the active registrations in the Manage phone numbers phone features under your customer portal.

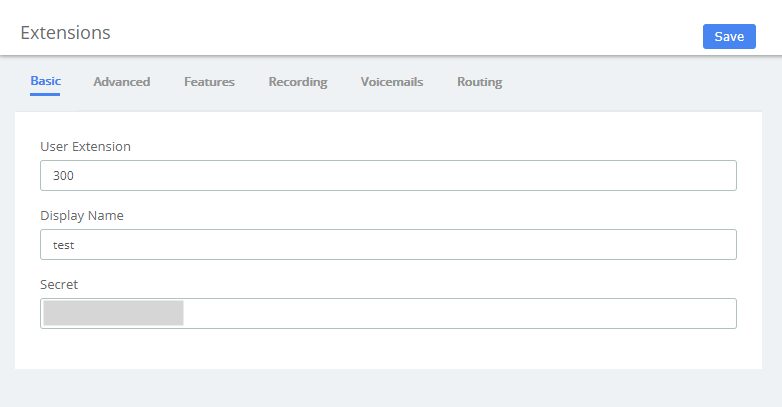
Create extensions
In the UC series IPPBX, 10 SIP extensions are preset for users. You can also add or edit extensions as you wish. Navigate to PBX > Extensions > Extensions, select SIP Extension and click Add to create a new SIP extension, you will set up the extension number, the name of the extension, the password, voicemail settings for the extension, and other options.
Following are the required parameters?
- User Extension: The extension number to dial to reach this user.
- Display name: The CallerID name for calls from this user will be set to this name.
Other advanced settings are also set at your own discretion. The default parameters are already set properly.
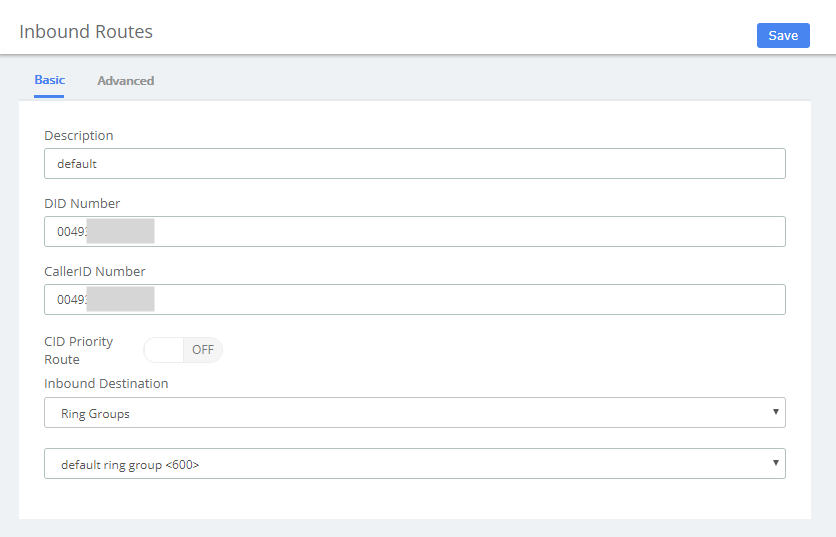
Set up inbound routing
The default inbound route destination is a ring group which include the 10 preset SIP extension. If you want to edit it or add a new route, navigate to PBX > Call Control > Inbound Routes, and then set what to do with calls that come into your system on any trunk, define the expected DID&CID Number and inbound destination and so on.
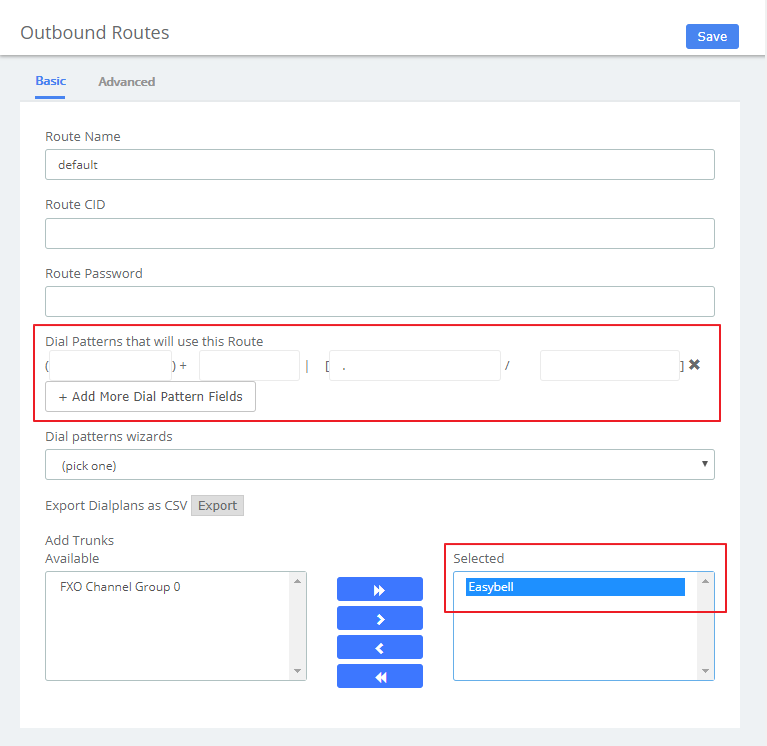
Set up outbound routing
Navigate to PBX > Call Control > Outbound Routes, you can edit the default route, remember to select the SIP trunk just created.
The Outbound Routes will tell your system which numbers your phones are permitted to call and which Trunk to send the calls to.